Creating an Account
To access JobLink's full range of job search options, build or upload your resume, and apply for jobs, you need to create a job seeker account. With a job seeker account you can post resumes, search thousands of job postings from approved employers, save a job search profile for future use, and more. This section walks you through the steps required to create a job seeker account, and explains how to edit or update your account information. If you want more detailed information on each page, or screenshots of the page itself, select the name of the step.
Why Am I Asked So Many Questions?
All of the questions we ask during your account registration are used to help us help you. The answers help us match you with the jobs and workforce programs that are most helpful for you. We also use the information to send reports to the federal government about how federally funded employment and training programs are being used. You control who sees your information, and we will not share any of your information without your permission. For more information on the security of your data, visit our Privacy Policy.
Self-Service vs. Staff-Assisted
JobLink gives you the choice among managing your own job search activities (self-service), seeking assistance from a workforce professional at your local American Job Center (staff-assisted), or a combination of both. You can use JobLink to perform a quick job search without creating an account. However, you cannot view the job details or apply for the job until you have registered for an account, and depending on your state, created a resume.
Even if you choose to begin by creating a self-service account, you can contact your local American Job Center for assistance at any time. Job center staff can guide you through exploring your career interests, creating a resume, registering for job training, contacting a potential employer, and more. To locate the job center nearest you, select American Job Centers beneath Contact Us in the footer of any page.
Creating a Job Seeker Account
You can enter the account creation process in several places across the JobLink website:
- On the JobLink home page, in the top navigation menu, select the arrow to the right of Job Seekers, then select Create an Account from the drop-down list.
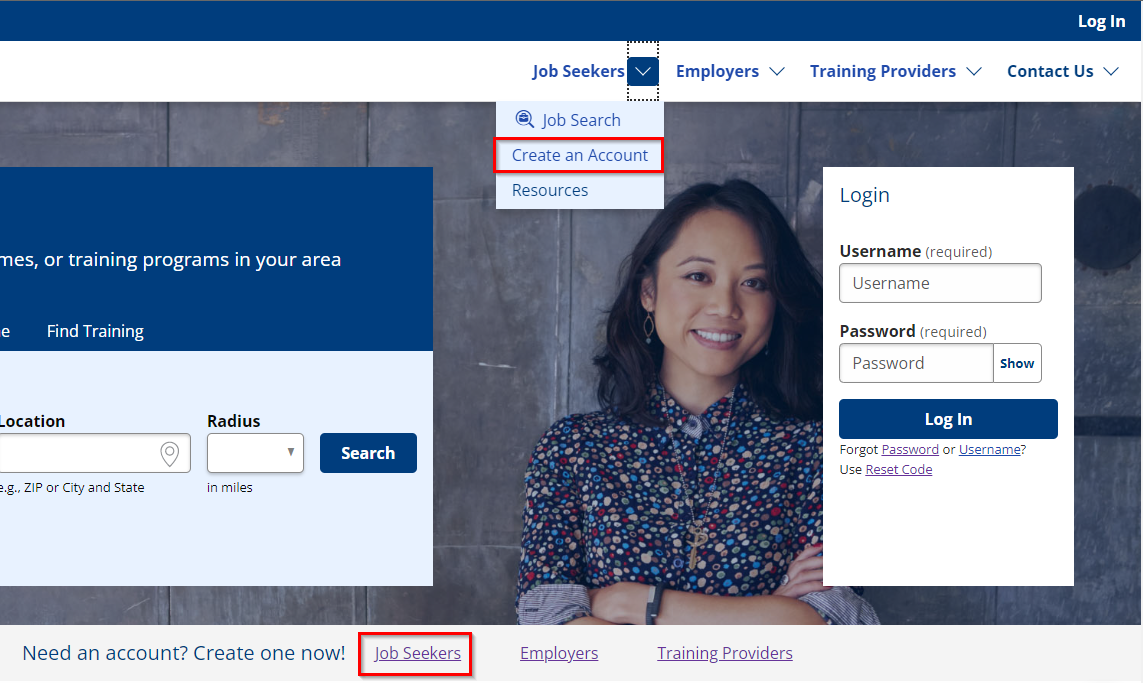
- In the banner that reads Need an account? Create one now!, select Job Seekers to be taken to the Create Job Seeker Account page.
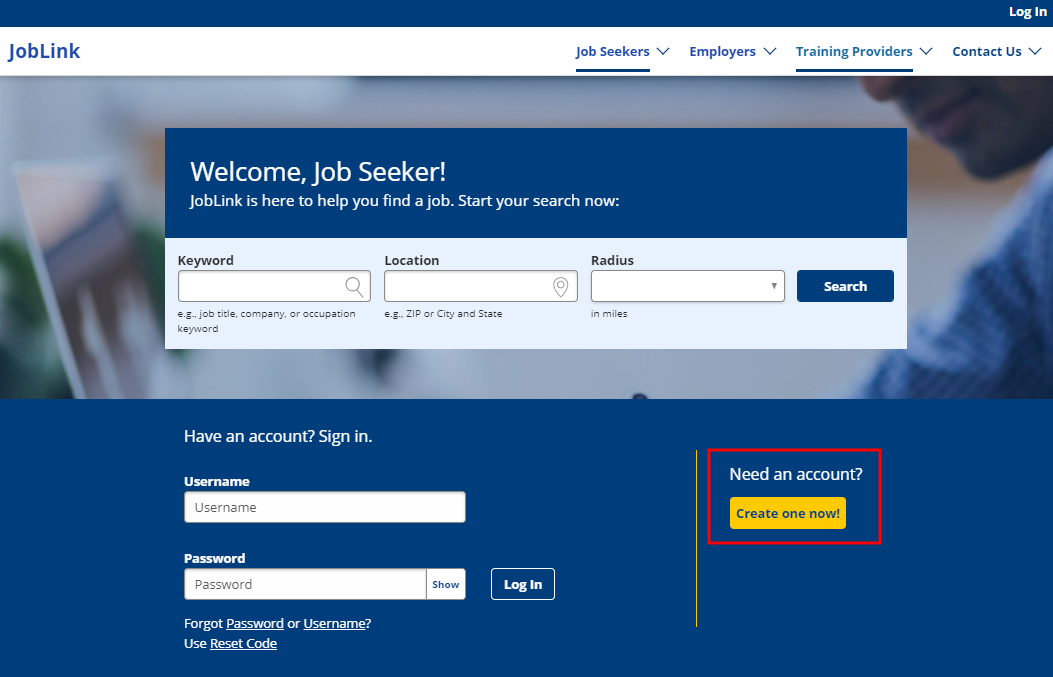
- From the Job Seekers landing page, next to the login fields, under Need an account?, select Create one now!
The following instructions outline the account registration process on a high level. Some of the following questions or pages may not display, depending on how you answer questions (e.g., If you answer that you are not a veteran, you will not see the Veteran Service Status or Veteran Service Details pages). Additional questions may display, depending on how you answer the existing questions. Also, additional questions that are not listed here may display, depending on your state. To view full details about a step in the registration process, select the name of that page.
How to Create an Account
- Navigate to the Create Job Seeker Account page. Brief text explains why we ask for your Social Security number. Provide, at a minimum, all required fields on this page. Select Submit.
- Review the Terms of Agreement page (some states may require the Terms of Agreement to be signed via DocuSign. See DocuSign (AZ, AR, ID, IL, ME and VT only) for more information).
- If you agree to the Data Privacy Notice and Equal Opportunity Statement sections, leave I Accept selected. For you to proceed, I Accept must be selected.
- Carefully read the Authorization for Release of Information section and select all of the statements that apply. You are not required to select any of the statements.
- To verify your selections, enter your username and password (if required by your state) and select Continue.
- Complete Registration Information. The page is partially pre-filled with information you provided on the Create Job Seeker Account page. Select Next.
-
Depending on how you answered questions on the previous page, you may see additional Veteran Service questions. Select Next when you have provided the required information.
- If you answered Yes to the active duty question, the Veteran Service Status page displays.
- Different questions will display on the Veteran Service Details page based on whether you have an Active Duty End Date in the Past, Honorable or Other Discharge, an Active Duty End Date in the Future, or an Active Duty End Date Less Than 180 Days from Start Date, Honorable or Other Discharge.
- If you answered Yes to the veteran spouse question, the Veteran Spouse Information page displays.
- If you answered No to both the active duty and veteran spouse questions, the Veteran Spouse Information page displays, with only one question.
- If you answered Yes to the active duty question, the Veteran Service Status page displays.
- Complete the Veteran Spouse Information page.
- Complete the Farmworker Status and details page. This page is targeted at migrant or seasonal farmworkers, job seekers eligible for the National Farmworker Jobs Program, or dependents of migrant or seasonal farmworkers.
- If you think you may meet the qualifications, select Yes and select Next. The Farmworker Details page displays.
- If you do not meet the qualifications, select No and select Next.
- Complete the Employment Status page about your current employment situation. Select Next.
- Complete the Unemployment Insurance Status page about any current or previous unemployment insurance benefits.
- Complete the Selective Service page, if it displays. Select Next.
- The Selective Service page displays for all users, regardless of the gender you identified in Registration Information. Select Yes if you have identified as female. Select Yes if you have identified as male and are 18 years or older and you have registered for selective service. If you have any questions about selective service registration or your compliance, view the links to SSS.gov. This question will not display to those born before January 1, 1960.
- Complete the Eligibility to Work in the U.S. page. Select Next.
- Complete the Dislocated Worker Status page. Select Next.
- Depending on your selection, the Dislocated Worker Details page may display. Complete the required information and select Next.
- On the Work Wanted page, enter a keyword that describes the job you are seeking. A drop-down list may appear to help you select a more specific title. After choosing a title, select Update Work Wanted.
- This job title is used to create job matches. If you are looking for more than one type of job, you can create additional resumes for those positions in the resume wizard. For now, just select the primary job you’re interested in.
- If you want to update your Work Wanted at any time, select My Profile and edit the Work Wanted section.
My Personal Information Overview
After completing the Edit Work Wanted page, the My Personal Information page displays all of the information you provided during the account registration process.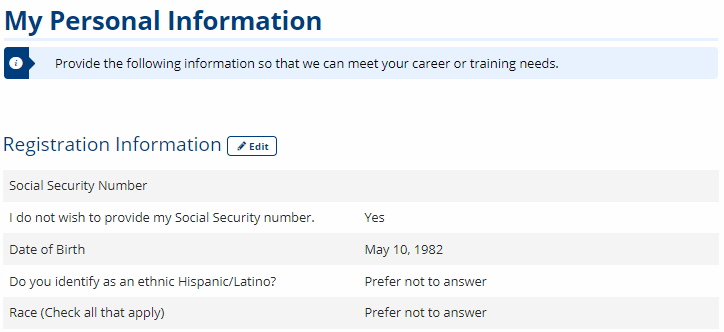
- Review the information carefully for accuracy.
- To change any answers, select Edit beside the title of the section.
- When you are satisfied that all of your information is accurate, at the bottom of the page, select Continue. Your job seeker account is now complete.
- If your state requires job seekers to create a resume as part of JobLink registration, the New Resume page displays. For further instructions, see Creating a Resume.
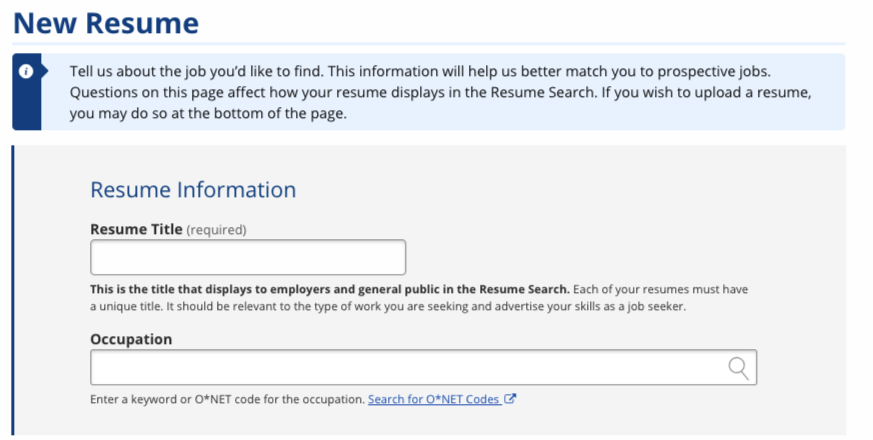
- If your state does not require you to create a resume as part of JobLink registration, your home page displays.
- If your state requires job seekers to create a resume as part of JobLink registration, the New Resume page displays. For further instructions, see Creating a Resume.