My Calendar (Staff)
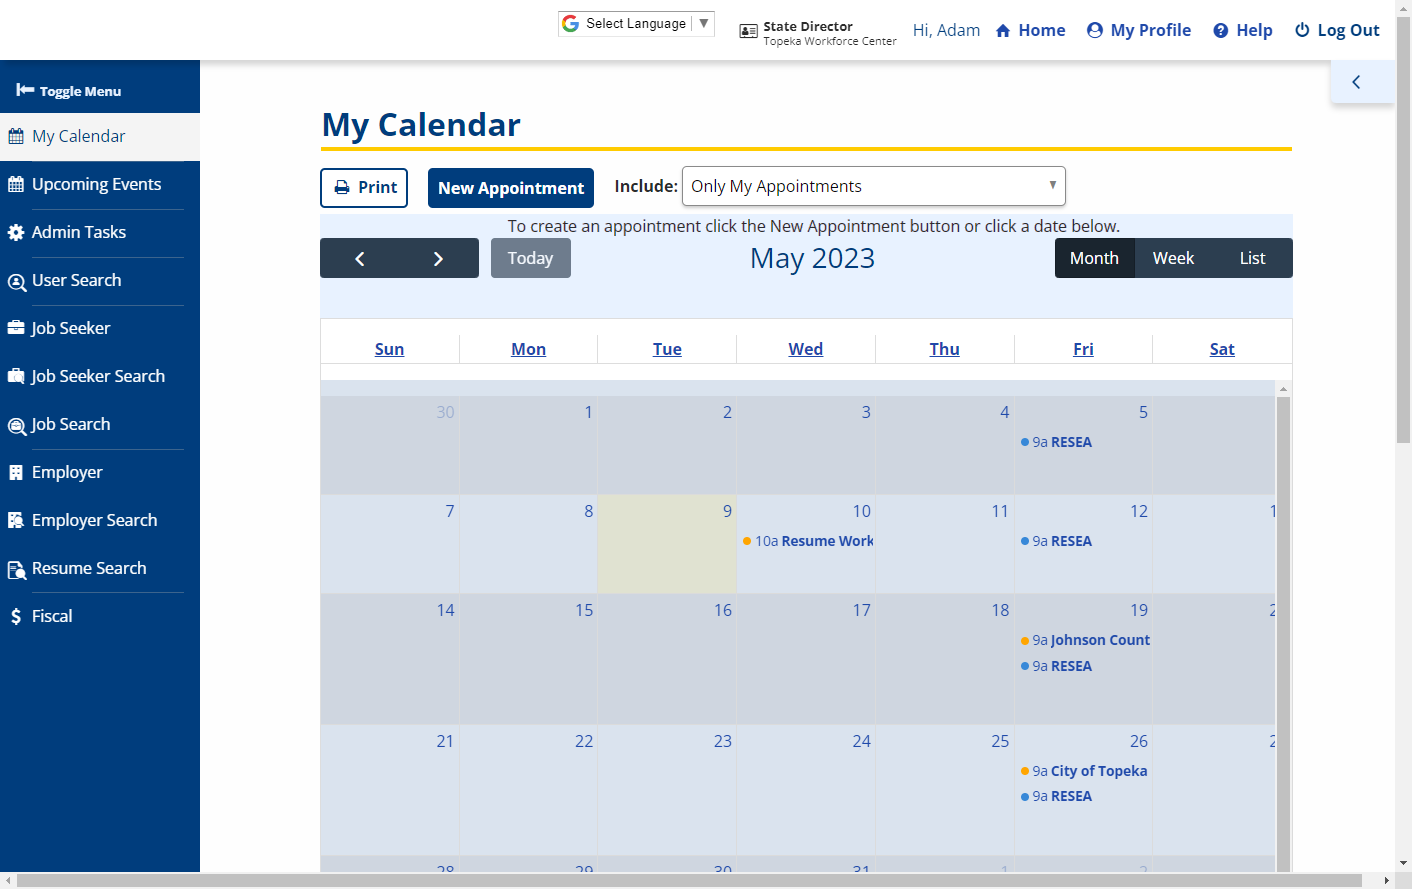
The My Calendar page allows you to view, manage, and create appointments.
-
By default, the current month/day is selected and the Month view is active. Click the arrow buttons (< >) to navigate to the previous or following month. You may also click Week to view appointments for the selected week or List to view appointments for the selected week in list form. Click Today to return to the current day.
-
Appointments for all your subordinate staff are also displayed by default. You may choose how to view subordinate appointments by selecting an option from the Include dropdown at the top of the page (For All My Subordinates, For Subordinates in My Office, Only My Appointments).
-
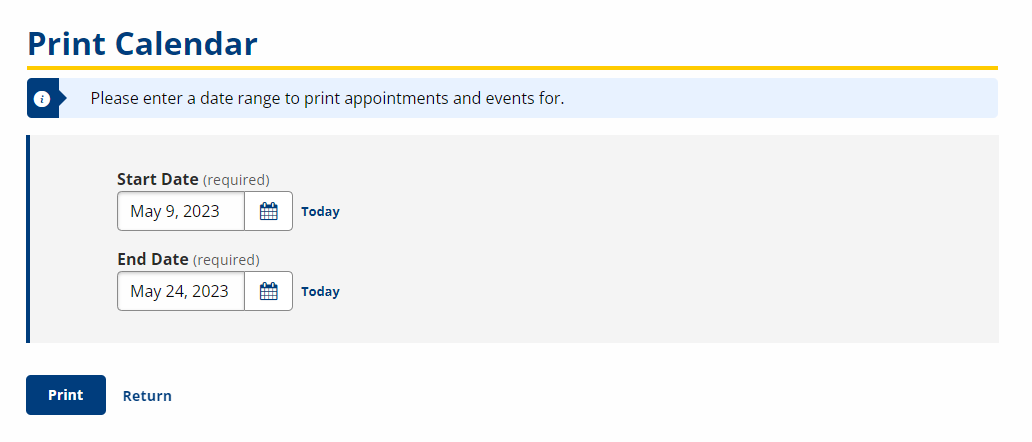
To print a list of appointments within a specific date range:
-
Click Print at the top of the calendar.
-
Select a Start Date and End Date, then click Print to generate the document. Times are shown in order and the staff user’s name, print date, and appointment details are displayed.
-
Creating an Appointment
-
Creating an appointment can be done in one of three ways:
-
Click New Appointment at the top of the page.
-
Click the date for which you want to create the appointment. In Month view, click the link of the date for which you want to create the appointment. I
-
In Week view, click the desired block of time under the date for which you want to create the appointment.
-
-
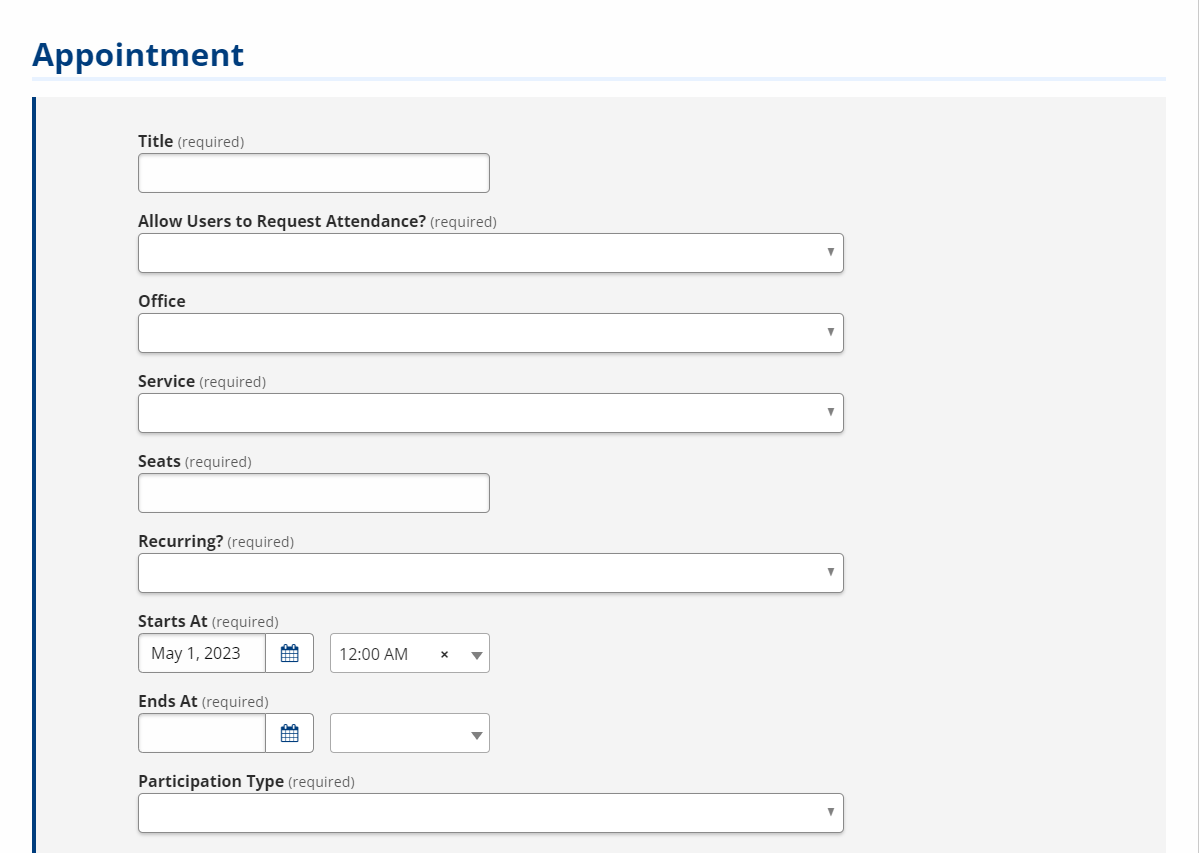
In the Appointment form that displays, enter a descriptive Title.
-
In the Allow Users to Request Attendance field, select Yes to allow job seekers to request attendance for this appointment from their calendars. Otherwise, select No.
-
Select the Office where this appointment will take place.
-
Select the Service related to this appointment.
-
Enter the maximum number of Seats for this appointment.
-
To make this a recurring appointment, select Yes from the Recurring? dropdown, then select a Recurrence Type (Daily, Weekly, Monthly) and enter/select a Recurrence End Date when the recurring meetings should terminate (up to one year from the current date).
- Daily recurring meetings are only created Monday through Friday.
-
The Starts At date and time is populated based on how the appointment was created. You may modify the date as needed by entering a new date or clicking the calendar icon and selecting a date. You may also modify the time as needed by entering a new time or selecting a time from the dropdown.
-
If you created the appointment by clicking the New Appointment button, the Starts At date defaults to the current date and the time defaults to 7:00 AM EST/4:00 AM PST.
-
If you created the appointment by selecting a date from the calendar in Month view, theStarts At date is populated with the date selected and the time defaults to 7:00 AM EST/4:00 AM PST.
-
If you created the appointment by selecting a date and time from the calendar in Week view, the Start At date and time defaults to the date and time selected.
-
-
Enter the Ends At date or click the calendar icon and select the date. Enter a time or select a time from the dropdown.
-
Select a Participation Type (In-Person, Virtual, Both, Phone):
-
If In-Person is selected, enter the Address information for where the appointment will take place.
-
If Virtual is selected, enter the Meeting URL where participants can access the meeting.
-
If Both is selected, enter both the Meeting URL and Address information.
-
If Phone is selected, enter the Phone Number that participants should call.
-
-
Enter a detailed Description of the appointment.
-
Click Save. The appointment is created and displays on your calendar.
Viewing/Editing an Appointment
-
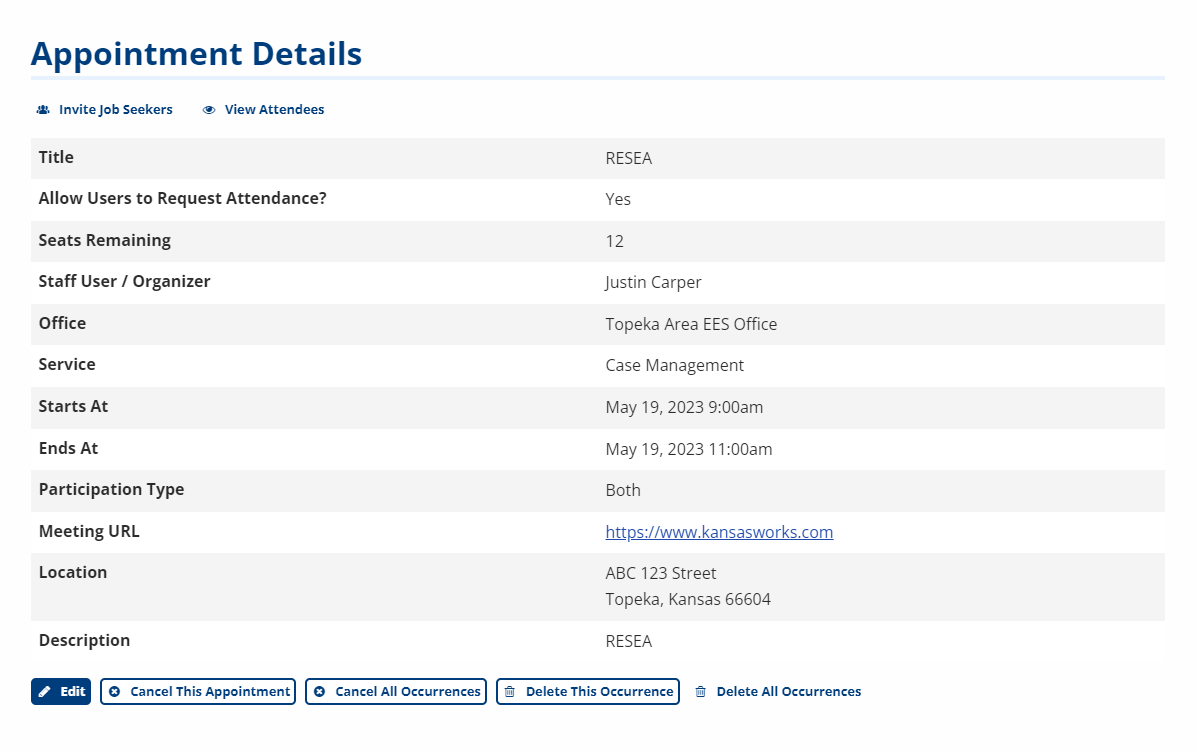
Click an appointment title (appointments are indicated in blue, while events are indicated in yellow). The Appointment Details dialog displays.
-
To invite specific job seekers to this appointment:
-
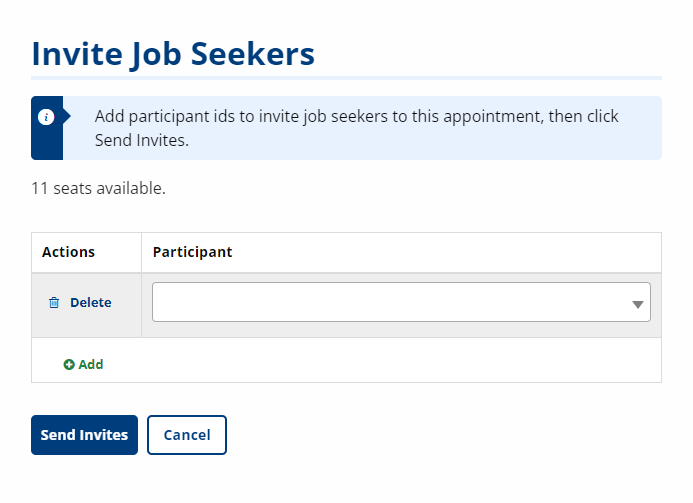
Click Invite Job Seekers at the top of the dialog.
-
In the Invite Job Seekers dialog that displays, click the dropdown and enter the search text, then select the job seeker from the search results.
-
To invite an additional job seeker, click Add and repeat the previous step. To remove a job seeker from the invite, click Delete. You cannot invite more job seekers than there are available seats.
-
Once all job seekers are selected, click Send Invites. An invite is sent to each job seeker.
-
-
If this appointment has attendees, click View Attendees to see a list of attendees and their statuses (Accepted, Declined, Canceled, No Response).
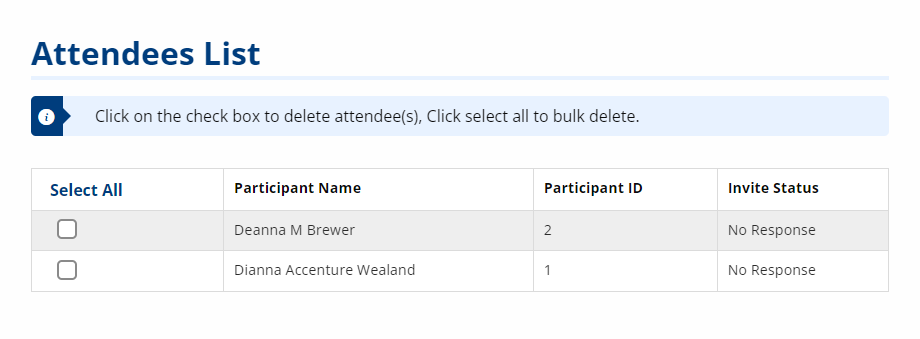
To delete attendees, check the box next to the attendee(s) you want to delete (or click Select All to select all attendees), then click Delete Selected Attendee(s). Click Continue in the confirmation dialog. -
To edit the appointment details, click Edit, make your changes in the form, then click Save.
-
To cancel this appointment, click Cancel this appointment. Enter a Cancellation reason, then click Yes, Cancel to confirm. If this is a recurring appointment, you may click Cancel All Occurrences to cancel all remaining occurrences. You may also click Delete This Occurrence or Delete All Occurrences to delete appointments.
- The Cancel This Appointment and Delete This Occurrence buttons do not display if it is 24 hours or less prior to the appointment's start time.