Contact Types
Staff must select the “Type of Contact” when entering notes. To manage the methods that appear to staff in the “Type of Contact” drop-down, use Contact Type in ServiceLink Admin.
Add Contact Type
- Navigate to Admin Tasks > ServiceLink tab > Contact Types tile. The Contact Type page displays.

- Click Add. The Contact Reasons page displays. Provide the following information:
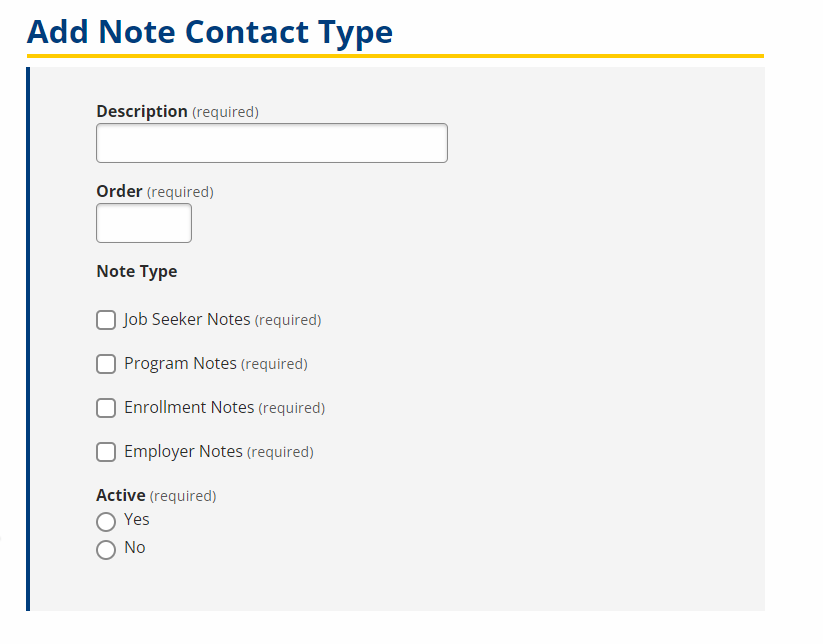
- Description: Text; Provide the description of the note that will display in the contact type drop-down.
- Order: Text; Provide the order in which you want the contact type to display. Note: This does not automatically reorder the other contact types.
- Note Type: Check Boxes; Select which note type(s) you want the contact type to display on.
- Active: Option; Select Yes to make the contact type active or No to make the contact inactive. Inactive contact types doe not display in the drop-down on notes pages.
- Click Submit.
Edit Contact Type
-
Navigate to Admin Tasks > ServiceLink tab > Contact Types tile
- Click the Edit link of the contact type to be edited. The Edit Contact Type page displays. The fields are pre-filled with the current values.
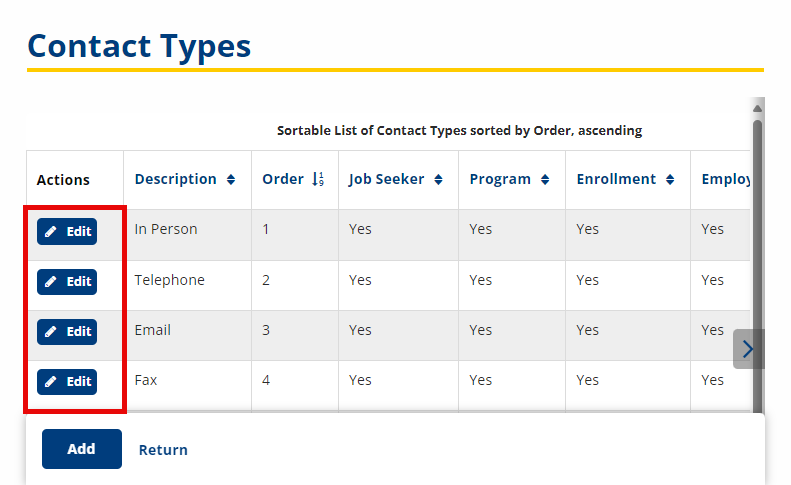
- Make any desired edits. Click Submit.