Resources Editor
Approved staff can add, edit, and delete resource categories, subcategories, and entries for each user type.
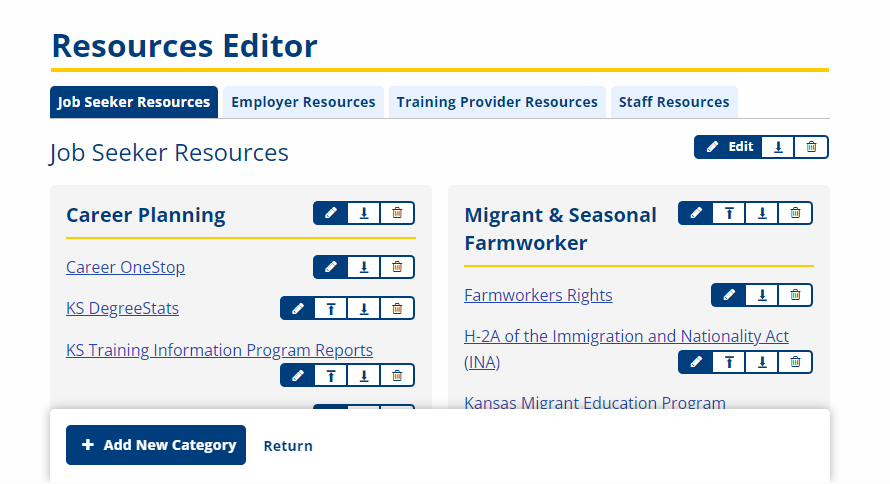
A category is a main tab on the Resources Editor page (Job Seeker Resources, Employer Resources, Training Provider Resources, Staff Resources). A subcategory is a section of a category. An entry is within a subcategory. The first step is to create a category, then add subcategories to the category and then entries to the subcategory.
Resource Categories
-
From the left-hand navigation menu, navigate to Admin Tasks > ServiceLink tab > Resources Editor tile. The Resources Editor page displays.
-
Across the top of the Resources Editor page are tabs for each resource category. Click a tab to bring that category into view.

Each category has its own subcategories and entries.
-
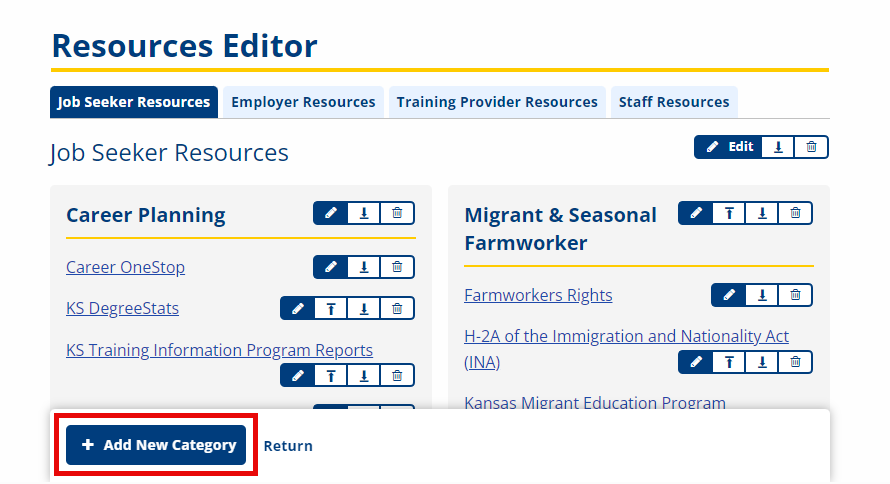
Click Add New Category at the bottom of the page to add a new category to the available tabs.
-
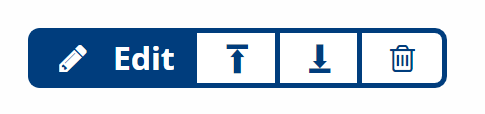
Each resource level has its own available functions to either edit, move, or delete the resource.
-
Click the Edit icon at each resource level—category, subcategory, entry—to make changes. What you're able to edit will depend on the resource level selected. Click Save when finished making your change.
-
Click the Move icon at each resource level—category, subcategory, entry—to move the location of the resources depending on its level and current location on the page.
-
Click the Delete icon at each resource level—category, subcategory, entry—to delete. You will be asked to confirm the deletion, and then click Delete.
-
-
Click a linked entry in a subcategory to open that resource.
Quick Resource Creation
Within the Resources Editor tile are links that provide quick access to create new resources or add to existing resources. 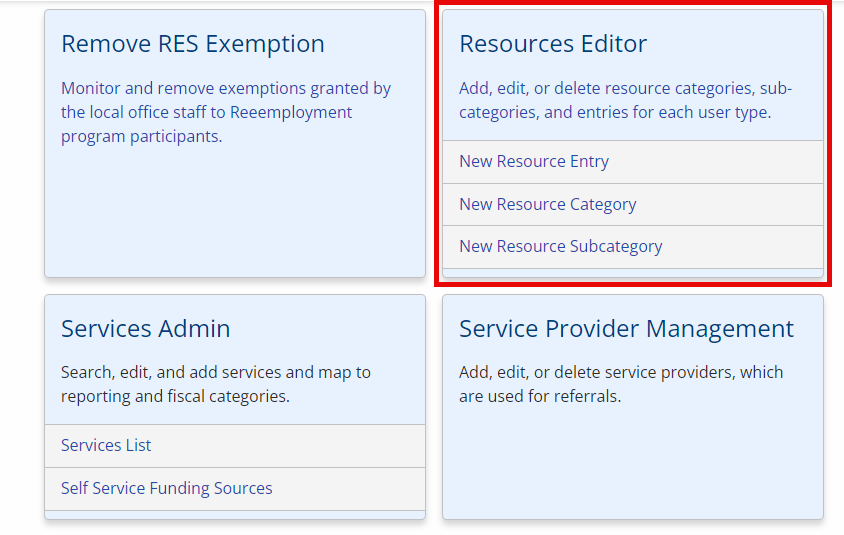
-
Click New Resource Entry to add a new entry within an existing subcategory.
-
Click New Resource Category to add a new tab to the available resource categories on the Resource Editor page.
-
Click New Resource Subcategory to add a subcategory to an existing category.
Note that these options to add new resources are also available on the Resources Editor page.
New Resource Entry
-
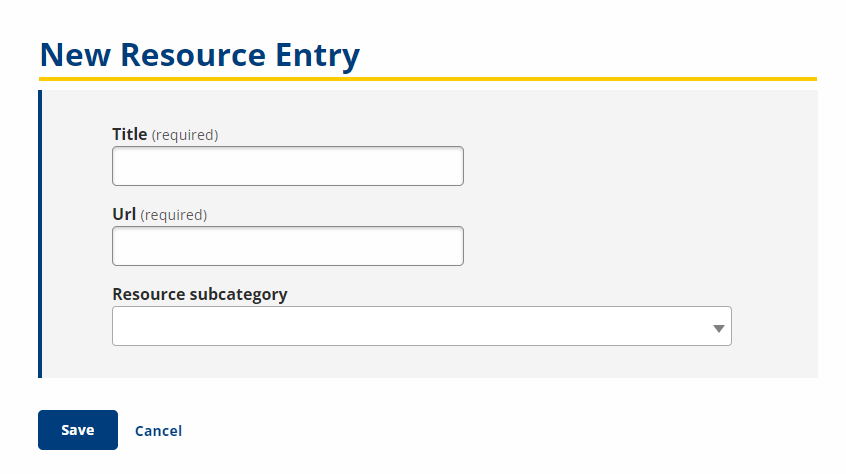
In the Resources Editor tile, click New Resource Entry. The New Resource Entry page displays.
-
Enter a Title and URL for the new entry, and then select the Resource subcategory from the list to place the entry in.
-
Click Save.
New Resource Category
-
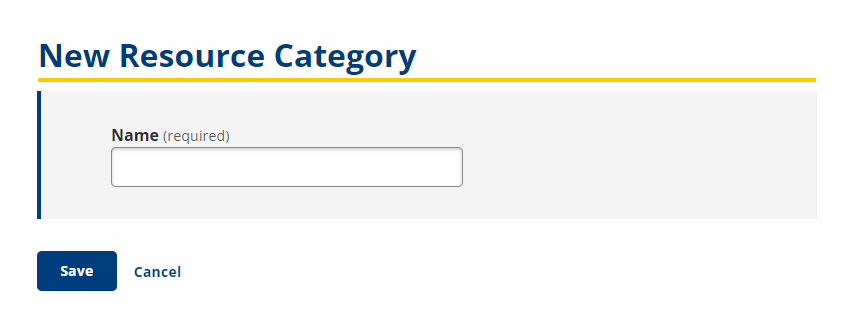
In the Resources Editor tile, click New Resource Category. The New Resource Category page displays.
-
Enter a Name for the new category.
-
Click Save. The new category is listed with the existing tabs across the top of the Resources Editor page.
New Resource Subcategory
-
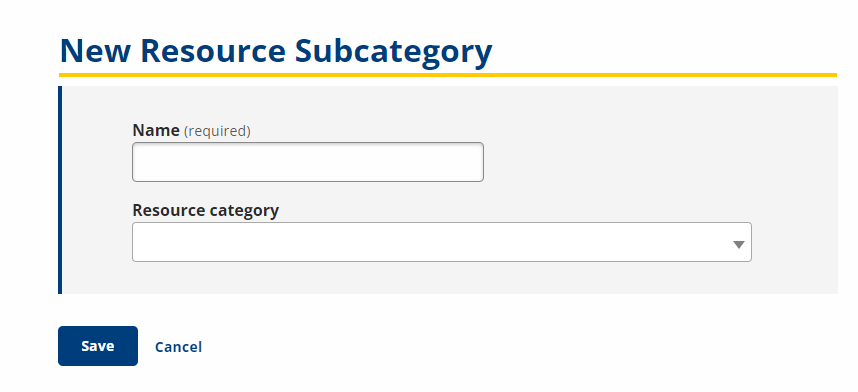
In the Resources Editor tile, click New Resource Subcategory. The New Resource Subcategory page displays.
-
Enter a Name for the subcategory, and then select the Resource category from the list to place the subcategory.
-
Click Save.