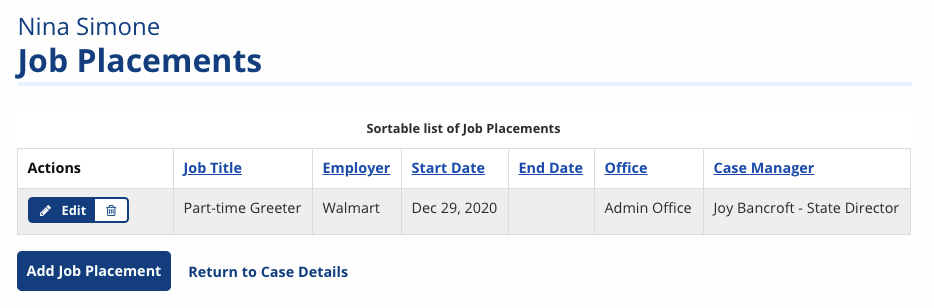
Job Placement
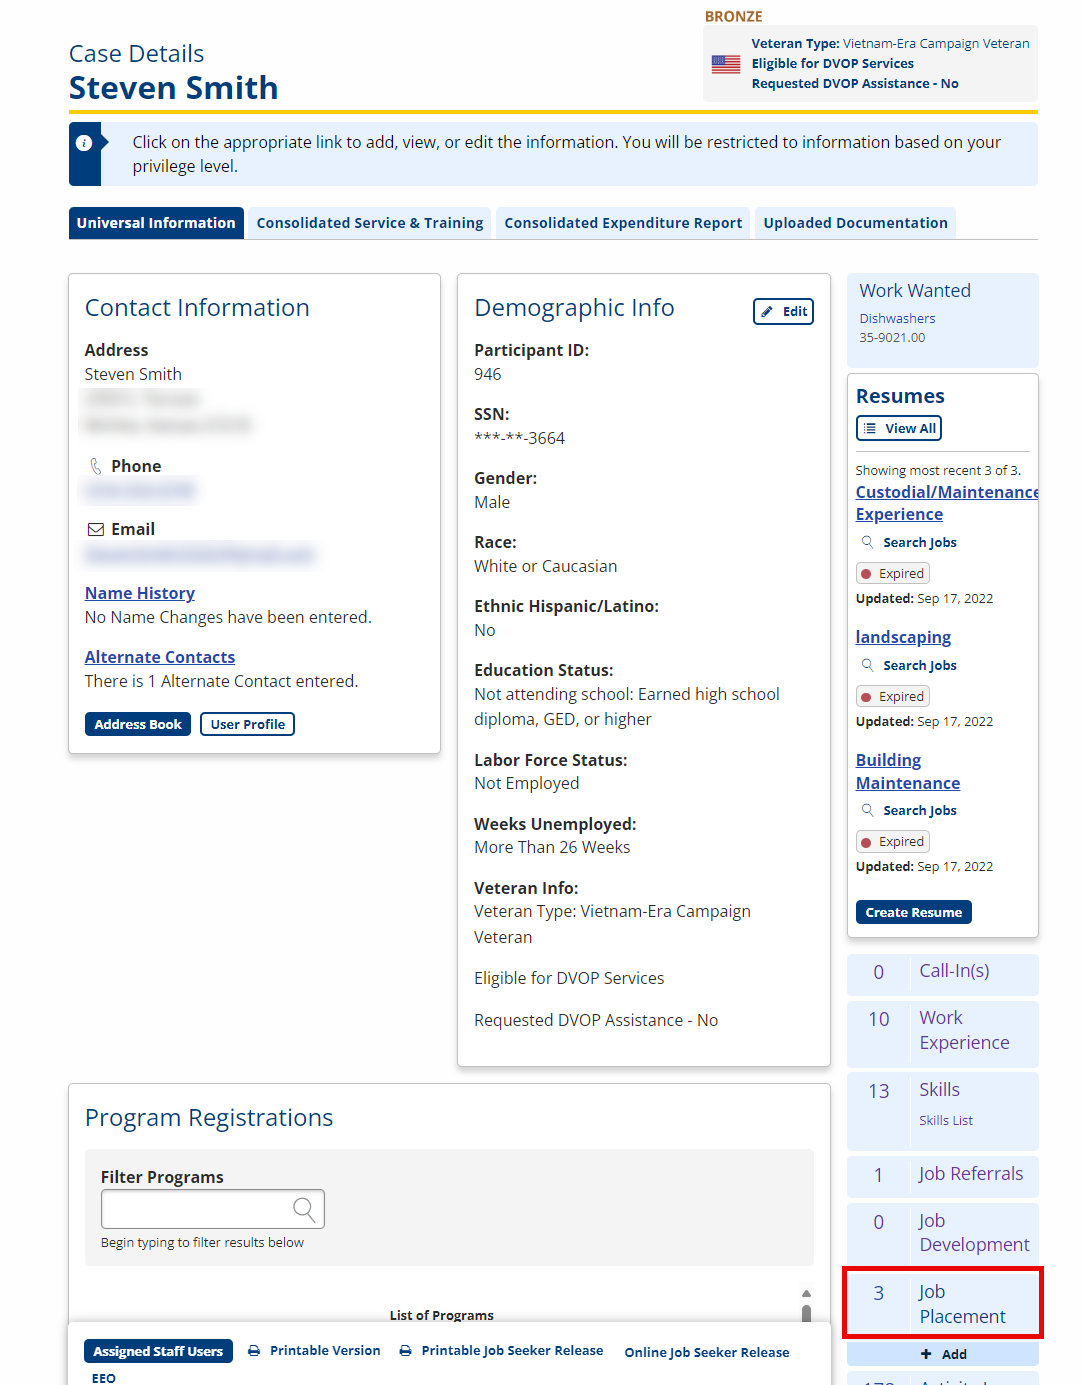
The Job Placements feature allows you to record any jobs the Job Seeker begins while receiving staff services. A job placement is automatically created any time a job referral in the system is resulted to "hired" for a job posting listed in the system. You can also manually enter job referrals. A count of the Job Seeker's referrals, as well as an Add button, displays in the Job Placement tile on the right of the Case Details page.
Add Job Placement
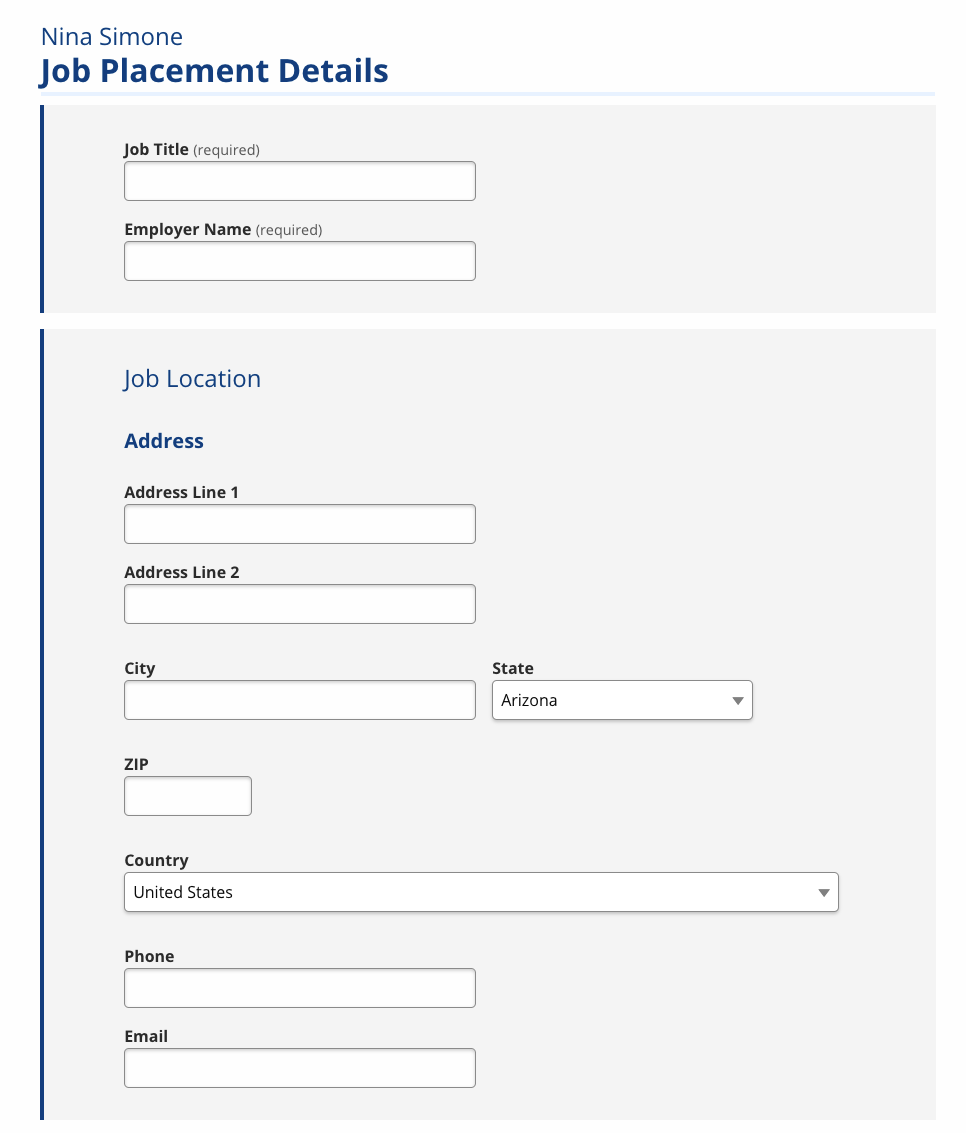
- From Case Details, in the Job Placements tile, select +Add. The Job Placement Details page displays.
- At minimum, complete all required information, which is indicated by (required).
- Job Title: (Required) Enter the title of the job in which the Job Seeker was placed.
- Employer Name: (Required) Enter the name of the employer for which the Job Seeker will be working.
- Address Line 1: Enter the employer's street address.
- Address Line 2: Enter the second line of the employer address if needed, such as a suite number.
- ZIP: Enter the employer's ZIP or postal code. The City and State are automatically populated once a selected ZIP is selected or when you tab/click away from this field.
- City: Enter the employer's city. Populated from the ZIP code but can be modified if needed.
- State: Select the employer's state; defaults to your state. Populated from the ZIP code but can be changed if needed.
- Country: If the employer is located in a country other than the United States, select that country.
- Phone: Enter the employer's primary phone number. A specific phone number for a contact person can be added in the following Contact Information section.
- Email: Enter the employer's email address. This email is the main generic email address of the company. A specific email address for a contact person can be added in the following Contact Information section.
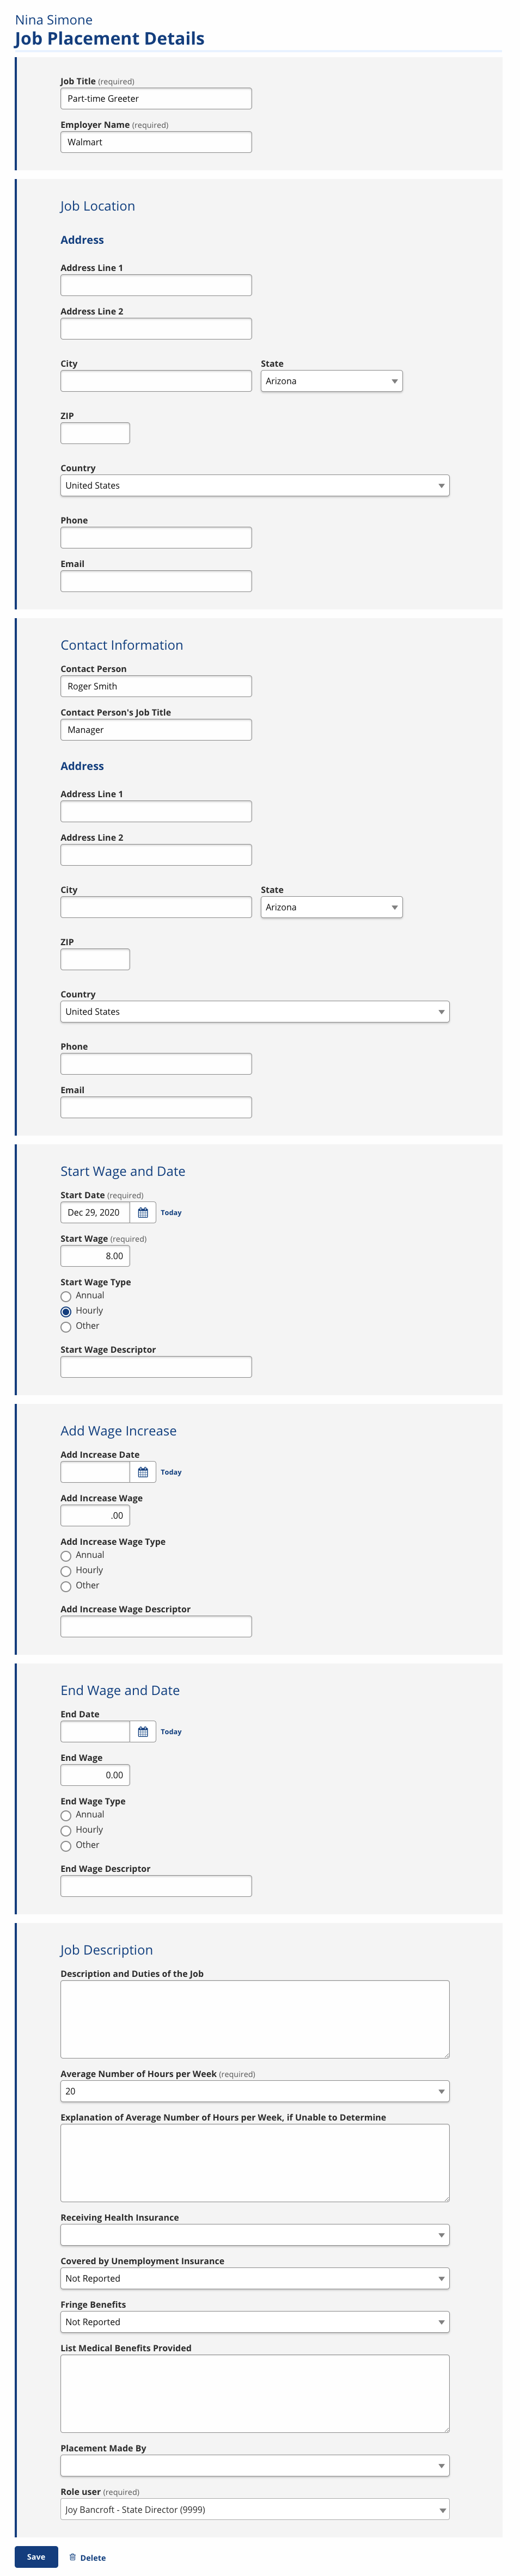
- Contact Person: Enter the name of the contact person. This is the individual within the company who could be contacted to follow up on the Job Seeker's job placement.
- Contact Person's Job Title: Enter the contact's job title.
- Address Line 1: Enter the contact's business address.
- Address Line 2: Enter the second line of the contact's business address if needed, such as a suite number.
- City: Enter the city of the contact's business address.
- State: Select the state of the contact's business address.
- ZIP: Enter the ZIP or postal code of the contact's business address.
- Country: If the contact's business is in a country other than the United States, select that country.
- Phone: Enter the contact's phone number. If available, use the contact's direct phone number and/or extension number.
- Email: Enter the contact's business email address.
- Start Date: (Required) Enter or select the start date for this job placement: the Job Seeker's first day on the job.
- Start Wage: (Required) Enter the start wage. Do not use commas or dollar signs.
- Start Wage Type: Select the type of wage: annual, hourly, or other. If other is selected, the Start Wage Descriptor field is required.
- End Date: Enter the end date for this job placement: the Job Seeker's last day on the job.
- End Wage: Enter the end wage. Do not use commas or dollar signs.
- End Wage Type: Select an end wage type: annual, hourly, or other. If other is selected, the End Wage descriptor field is required.
- End Wage Descriptor: Enter a description of how the Job Seeker was paid. For example, by piece or on commission.
- Description and Duties of the Job: Enter text to describe the job and the duties the Job Seeker will perform on the job.
- Average Number of Hours per Week: (Required) Select an option from the drop-down: Less than 5, 10, 20, 30, 40, 50, or Unable to Determine. If Unable to Determine is selected, Explanation of Hours per Week if Unable to Determine is required.
If this information is not available in the job posting, the default will be Less than 5.
- Explanation of Hours per Week if Unable to Determine: Enter text to describe the Job Seeker's hours per week. For example, the Job Seeker may be on call and work as needed. In this case, the hours could vary so widely that an accurate estimate would not accurately reflect the Job Seeker's hours per week.
- Receiving Health Insurance: Select whether the employer offers health insurance: None offered, Available- Partially paid, Available - Fully paid, Available - Not Participating, Available - Self-paid.
- Covered by Unemployment Insurance: Select whether the employer offers UI: Not reported, Yes, No.
- Fringe Benefits: Select whether the employer offers fringe benefits (e.g., workman's comp, leave time): Not reported, Yes, No.
- List Medical Benefits Provided: Enter details about available medical benefits.
- Placement Made By: Select the appropriate option from the drop-down (may vary by state): Job Fair, Newspaper, Other, Other Internet Site, Recruiter, Referrals/Word of Mouth, Staffing Services/Temp Agencies.
- Role user: The case manager entering the placement info. Other case managers in the Job Seeker's program registration office also display.
- Select Save to save the information and return to the Job Placements page, or select Cancel to return to the Job Placements page without saving.
Job Referral Placements
When staff set the outcome of an job referral to hired, a job placement is automatically created. Information from the job posting prefills fields wherever possible.
Add Wage Increase on Job Placement
- To add a wage increase to an existing Job Placement, from Case Details, select the Job Placement tile. The Job Placements page displays.
- Select Edit for the relevant entry. The Job Placement Details page displays, with the current job placement information.
- Select the Add Wage Increase button at the bottom of the page. The Add Wage Increase section displays, between the Start Wage and Date section an the End Wage and Date section. Fill out the fields:
- Add Increase Date: Enter or select the date of the wage increase for this job placement: the date the wage increase was effective.
- Add Increase Wage: Enter the amount of the wage increase. (Enter the wage the job seeker is now earning, not the amount of the increase. For example, if the job seeker was earning $11 and now earns $12, enter $12, not $1.) Do not use commas or dollar signs.
- Add Increase Wage Type: Select a wage type: annual, hourly, or other. If other is selected, the Add Increase Wage Descriptor field is required.
- Add Increase Wage Type Descriptor: Enter a description of how the Job Seeker's pay has increased. For example, by piece or commission.
- When you are finished, select Save.
Edit/Delete Job Placements
- Select Edit for the relevant entry. The Job Placement Details page displays, with the current job placement information.
- To edit a job placement, select Edit next to the relevant entry. The Job Placement Details page displays, with the current job placement information.
- Make changes as needed, then select Save to save the changes and return to Job Placements. Select Delete if you wish to remove the job placement entry.