Add Resume
If a Job Seeker does not have an existing resume, or if they want a new resume, you can help them build one from scratch using the resume wizard (if they already have a resume file (Word doc or PDF), see Upload Resume) The resume wizard utilizes O*NET to generate skills and qualifications a Job Seeker has based on their education and work experience. The online resume wizard is split into 11 steps.
Before getting started, it's important to have work experience information collected, including dates of employment and employer city and state.
Quick Links:
- Step 1: New Resume/Resume Overview
- Step 2: Address Book
- Step 3: Work Experience
- Step 4: Education
- Step 5: Awards
- Step 6: Licenses and Certifications
- Step 7: Additional Information
- Step 8: Military Service
- Step 9: Driver's License
- Step 10: References
- Step 11: Review & Post
Step 1: New Resume/Resume Overview
The New Resume page primarily asks questions about the Job Seeker's job preferences. With the exception of the resume title, the information provided on the New Resume (Resume Overview) page will not display on the resume, but will be used to identify the resume in the Resume Search and to better match the Job Seeker with available jobs. This page must be filled out for each unique resume.
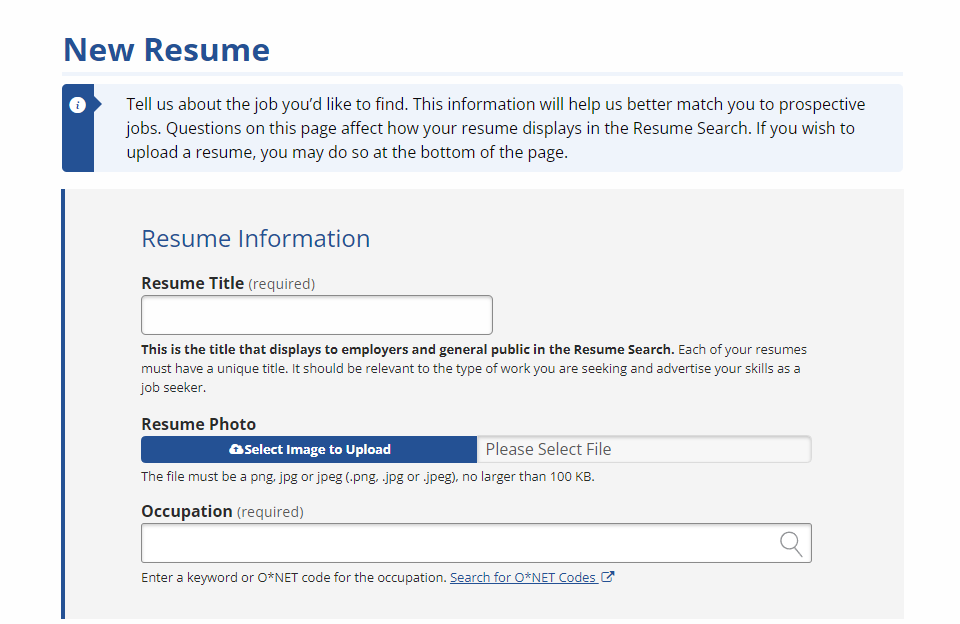
To get started, select Create Resume in the Resumes tile of Case Details page, or from the My Resumes page, select Create a Resume. The New Resume page displays. At minimum, complete all required information, which is indicated by (required). (See screenshot and table below.)
Select Create Resume.
| Field | Description |
|---|---|
| Resume Title (required) | (Text) Enter a title for the resume, such as the title of the target job.
This will display to potential employers and staff as the title in the Resume Search results. You can create an unlimited number of resumes, but each resume must have a unique title. |
| Resume Photo | If you want to upload a photo of the Job Seeker, click Select Image to Upload. Locate the image file in your computer's file explorer and select Open. The file name displays.
The file must be a .png, .jpg, or .jpeg, and can be no larger than 100 KB. |
| Occupation (required) | (Text) Enter a keyword related to the occupation. A drop-down list will display as you type; select the most accurate O*NET code and title. |
| How many years and/or months of relevant work experience do you have? (required) | (Digits) Enter (or use up arrow) the total number of years and months of work experience that is relevant to the work the Job Seeker is seeking. |
| Education level: | (Drop-down) Select the highest level of education completed:
|
| Are you willing to move to another location for work? (required) |
(Radio) Select Yes or No. |
| Where would you like to find employment? (required) | (Text) Enter the city and state or ZIP near which the Job Seeker is willing to work. |
| What is the maximum distance (in miles) you are willing to commute to work one-way? (required) | (Digits) Enter a number indicating the number of miles the Job Seeker is willing to commute. |
| Are you willing to travel as a requirement of the job? (required) |
(Radio) Select Yes or No. |
| What is your desired salary type? (required) | (Radio) Select the desired salary type:
|
| What is your minimum desired salary? (required) | (Digits) Enter the number value of the Job Seeker's desired salary, omitting commas.
For example, 30000 for annual; 12.50 for hourly, 0.75 for per mile. The maximum allowable amounts are 1000000 for annual, 100.00 for hourly, and 1000000 for Other. To research average local or national wages for the occupation, select the Market Wage Information link. A CareerOneStop Salary Finder page displays in a new window. |
| Are you seeking full-time or part-time work? (required) | (Radio) Select the desired amount of work:
|
| What shift do you prefer to work? (required) | (Radio) Select the preferred shift:
|
| Are you willing to accept temporary work? (required) |
(Radio) Select Yes or No. |
| Do you have a valid driver's license? (required) |
(Radio) Select Yes or No. |
| Do you want job matches for this resume emailed to you? |
(Radio) Select Yes or No. |
After selecting this button, if you exit before completing the resume, it will display in My Resumes as an incomplete resume and will not be visible to employers until it is published.
Objective Statement
The resume wizard provides sample objective statements based on the job title selected for the resume. These statements come from O*NET. Brackets surround editable sample text. You will be able to edit the objective statement later or write your own in Step 11: Review & Post. Select the one that best matches the Job Seeker's objective and select Update Objective. You can also skip this step and proceed to the Summary of Qualifications.

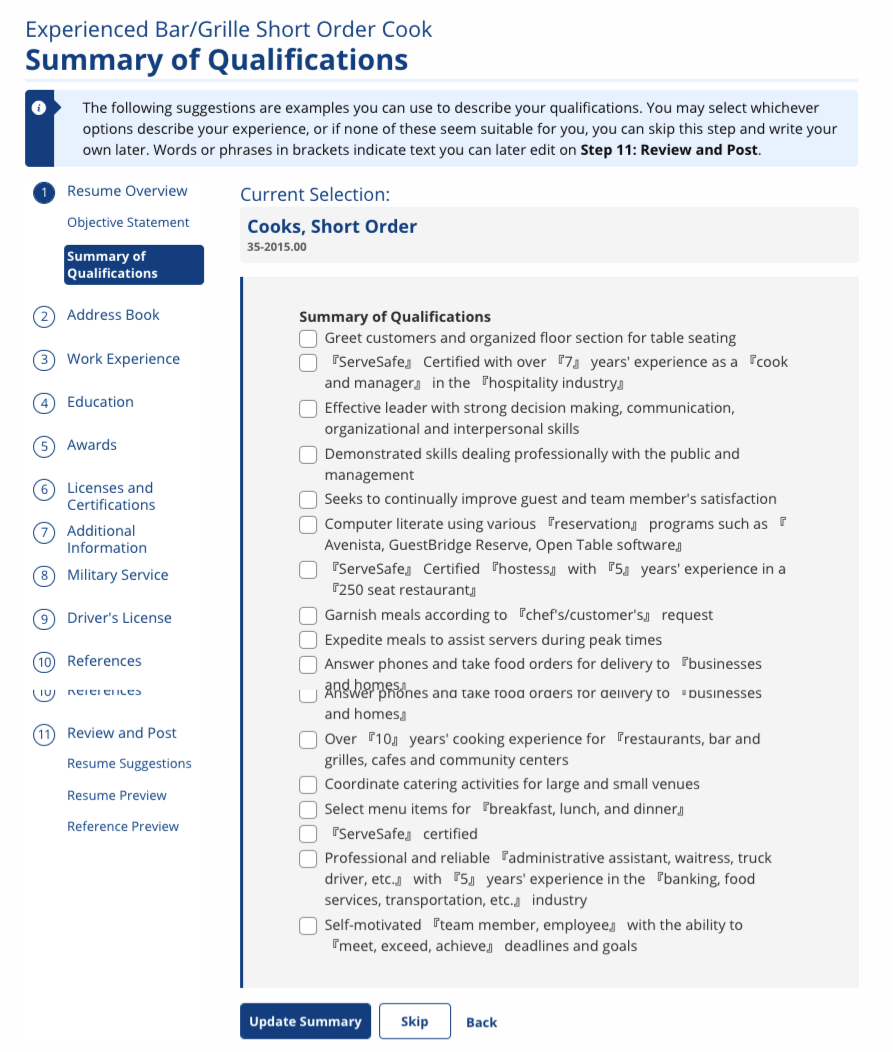
Summary of Qualifications
The resume wizard also provides sample qualifications to highlight based on the job title selected for the resume. These statements come from O*NET. Brackets surround editable sample text. You will be able to edit the summary of qualifications later or write your own in Step 11: Review & Post. Select the items that best match the Job Seeker's skills and select Update Summary. You can also skip this step.
Step 2: Address Book
The address book displays all contact information provided during registration and any additional contact updates that have been made since registration. Ensure that the contact information the Job Seeker wants to display on your resume is included in the address book. If not, you can add or edit entries. When are satisfied with the contact information listed, select Continue.

See the Address Book section for full explanation of how to add, edit, and delete contact information.
Step 3: Work Experience
The Work Experience section of the resume wizard allows you to enter as many of your previous jobs as you wish, and it helps you come up with language to describe your qualifications. You have the opportunity on Step 11: Review and Post to select which jobs display on the resume. From Step 3, you can add new jobs and edit or remove existing jobs. When you are finished, select Continue to proceed to the next step.
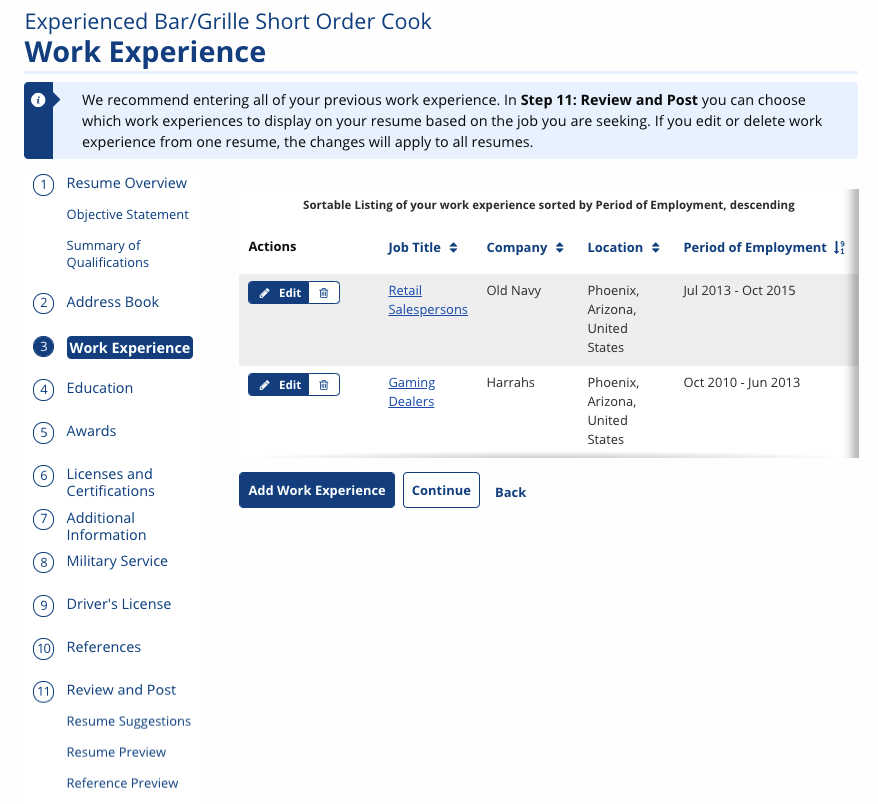
Add Work Experience
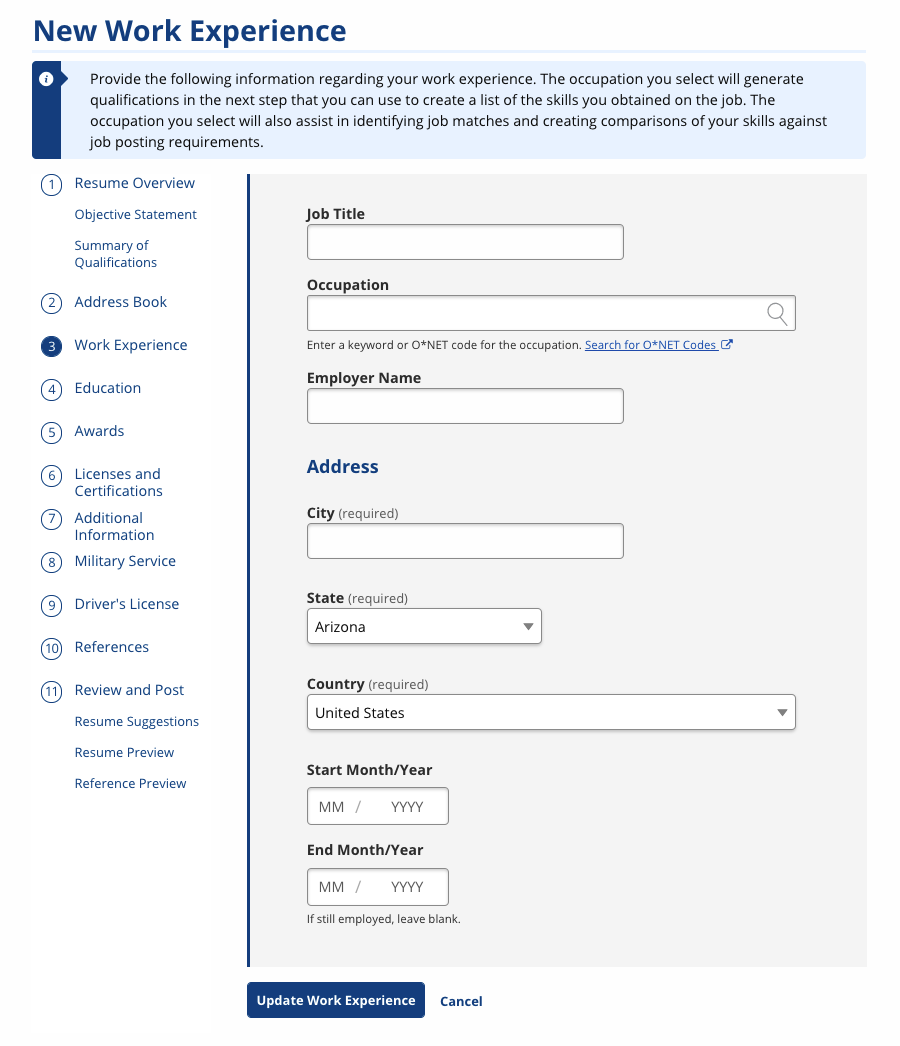
Select Add Work Experience. The New Work Experience page displays. At minimum, complete all required information, which is indicated by (required). When you are finished, select Update Work Experience.
| Field | Description |
|---|---|
| Job Title (required) | (Text) Enter your job title. |
| Occupation (required) | (Text) Enter a keyword related to the occupation. A drop-down list will display as you type; select the most accurate O*NET code and title. If you cannot find an exact match, choose a title that most closely matches the Job Seeker's work. |
| Employer Name (required) | (Text) Enter the name of the company the Job Seeker worked for. |
| City (required) | (Text) Enter the city in which the company is located. |
| State (required) | (Drop-down) Select the state in which the employer is located. |
| Start Month/Year (required) | (Digits/Arrows) Enter the month and year the Job Seeker began the job. |
| End Month/Year | (Digits/Arrows) Enter the month and year the Job Seeker left the job. If the Job Seeker is still working there, leave the fields blank. |
Work Experience: Qualifications
Based on the occupation title you selected, O*NET populates a list of talents, tools and technology, and work activities that the Job Seeker may have used on the job. Next to any item that describes the Job Seeker's qualifications, select My Skills. These items will be added to the Job Seeker's My Skills list and help with job matching and gap analyses. Next to any item you wish to display on the resume, select Display on Resume. When you are finished, select Save.

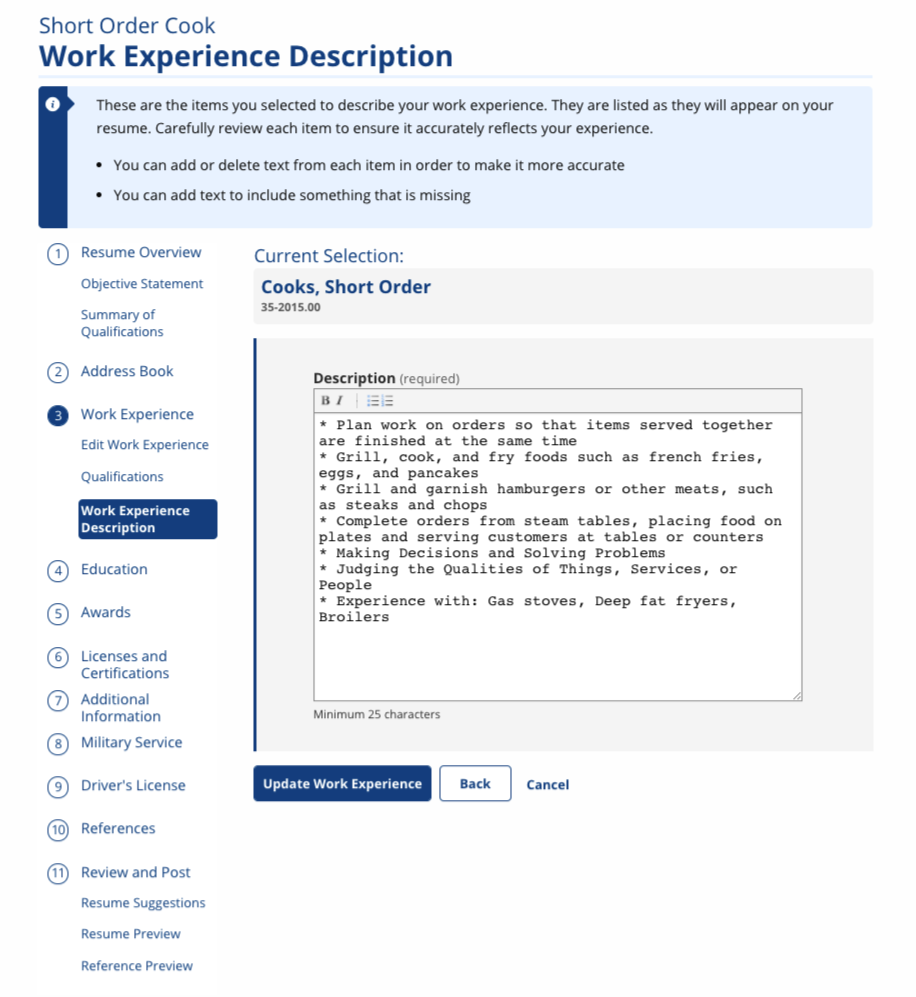
Work Experience Description
All items you selected to display on the resume show in the text box. Make any edits and select Update Work Experience.
If you skipped the Qualifications step, you must enter at least 25 characters in the text box to describe the work experience. If you would like to review the list of Qualifications again, select Review and Edit Selections.
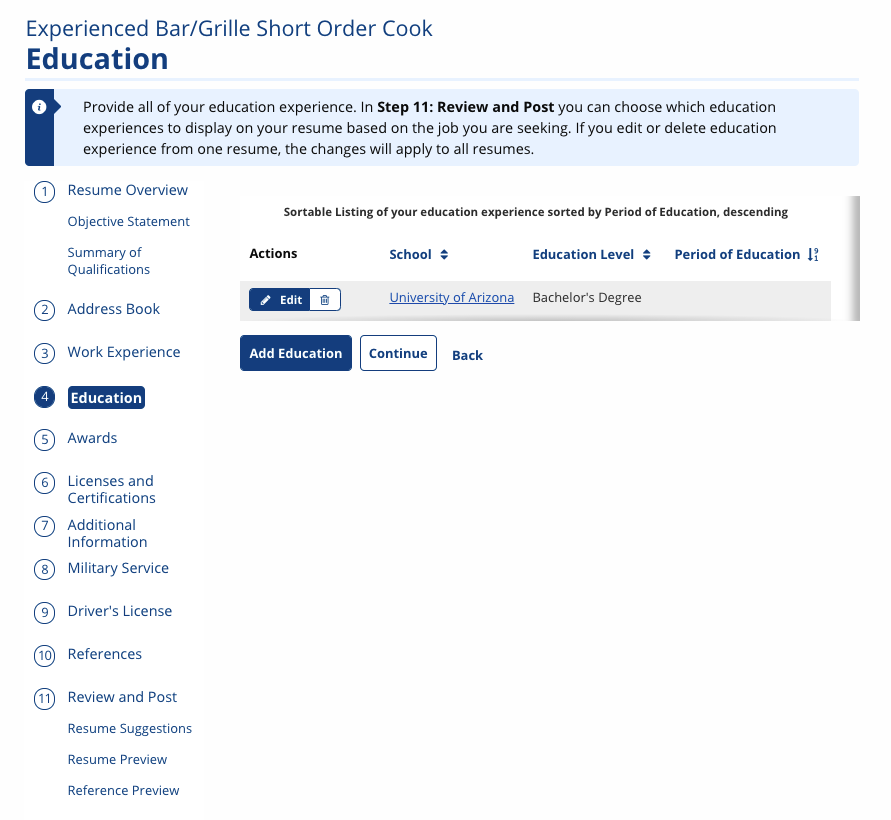
Step 4: Education
The Education section of the resume wizard allows you to enter information about the Job Seeker's education. From Step 4, you can add new education info and edit or remove existing info. When you are finished, select Continue to proceed to the next step.
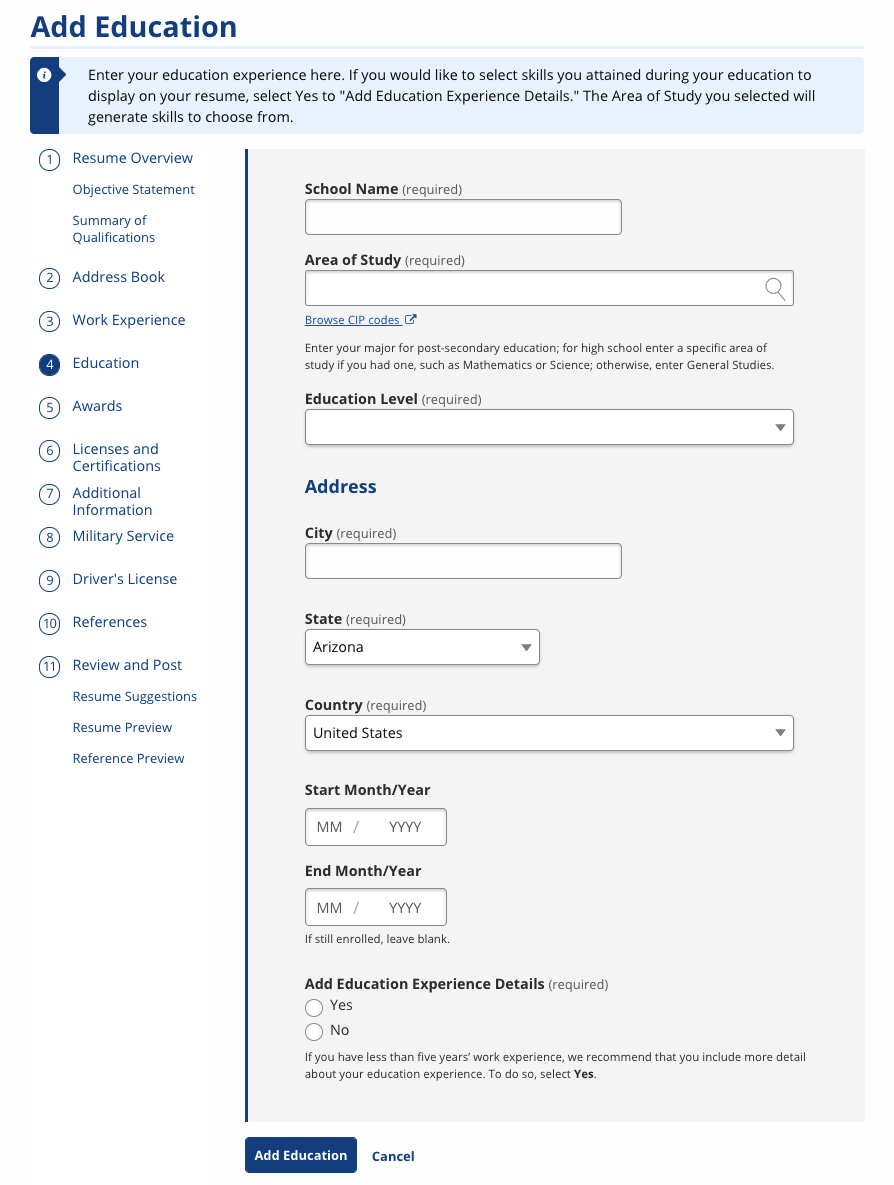
Add Education
Select Add Education. The Add Education page displays. At minimum, complete all required information, which is indicated by (required). When you are finished, select Add Education.
| Field | Description |
|---|---|
| School Name (required) | (Text) Enter the name of the school the Job Seeker attended. |
| Area of Study (required) | (Text) Enter a keyword related to what the Job Seeker studied.
If you cannot find a match, or if you are listing high school education, use "General Studies." |
| Education Level (required) | (Drop-down) Select the highest level of education completed:
|
| City (required) | (Text) Enter the city in which the school is located. |
| State (required) | (Drop-down) Select the state in which the school is located; defaults to the state of the application. |
| Country (required) | (Drop-down) Select the country in which the school is located; defaults to the United States. |
| Start Month/Year | (Digits/Arrows) Enter the month and year the Job Seeker began the program. |
| End Month/Year | (Digits/Arrows) Enter the month and year the Job Seeker left or completed the program. If the Job Seeker is still working there, leave the fields blank.
Older job seekers may want to remove the dates of their education to better conceal their age on their resume. |
| Add Education Experience Details (required) |
(Radio) Select Yes or No. Select Yes if you would like to showcase specific skills the Job Seeker gained in their education. If you selected "General Studies," there are no qualifications to choose from, so you must write your own description of the Job Seeker's educational experience. |
When you are finished, select Add Education.
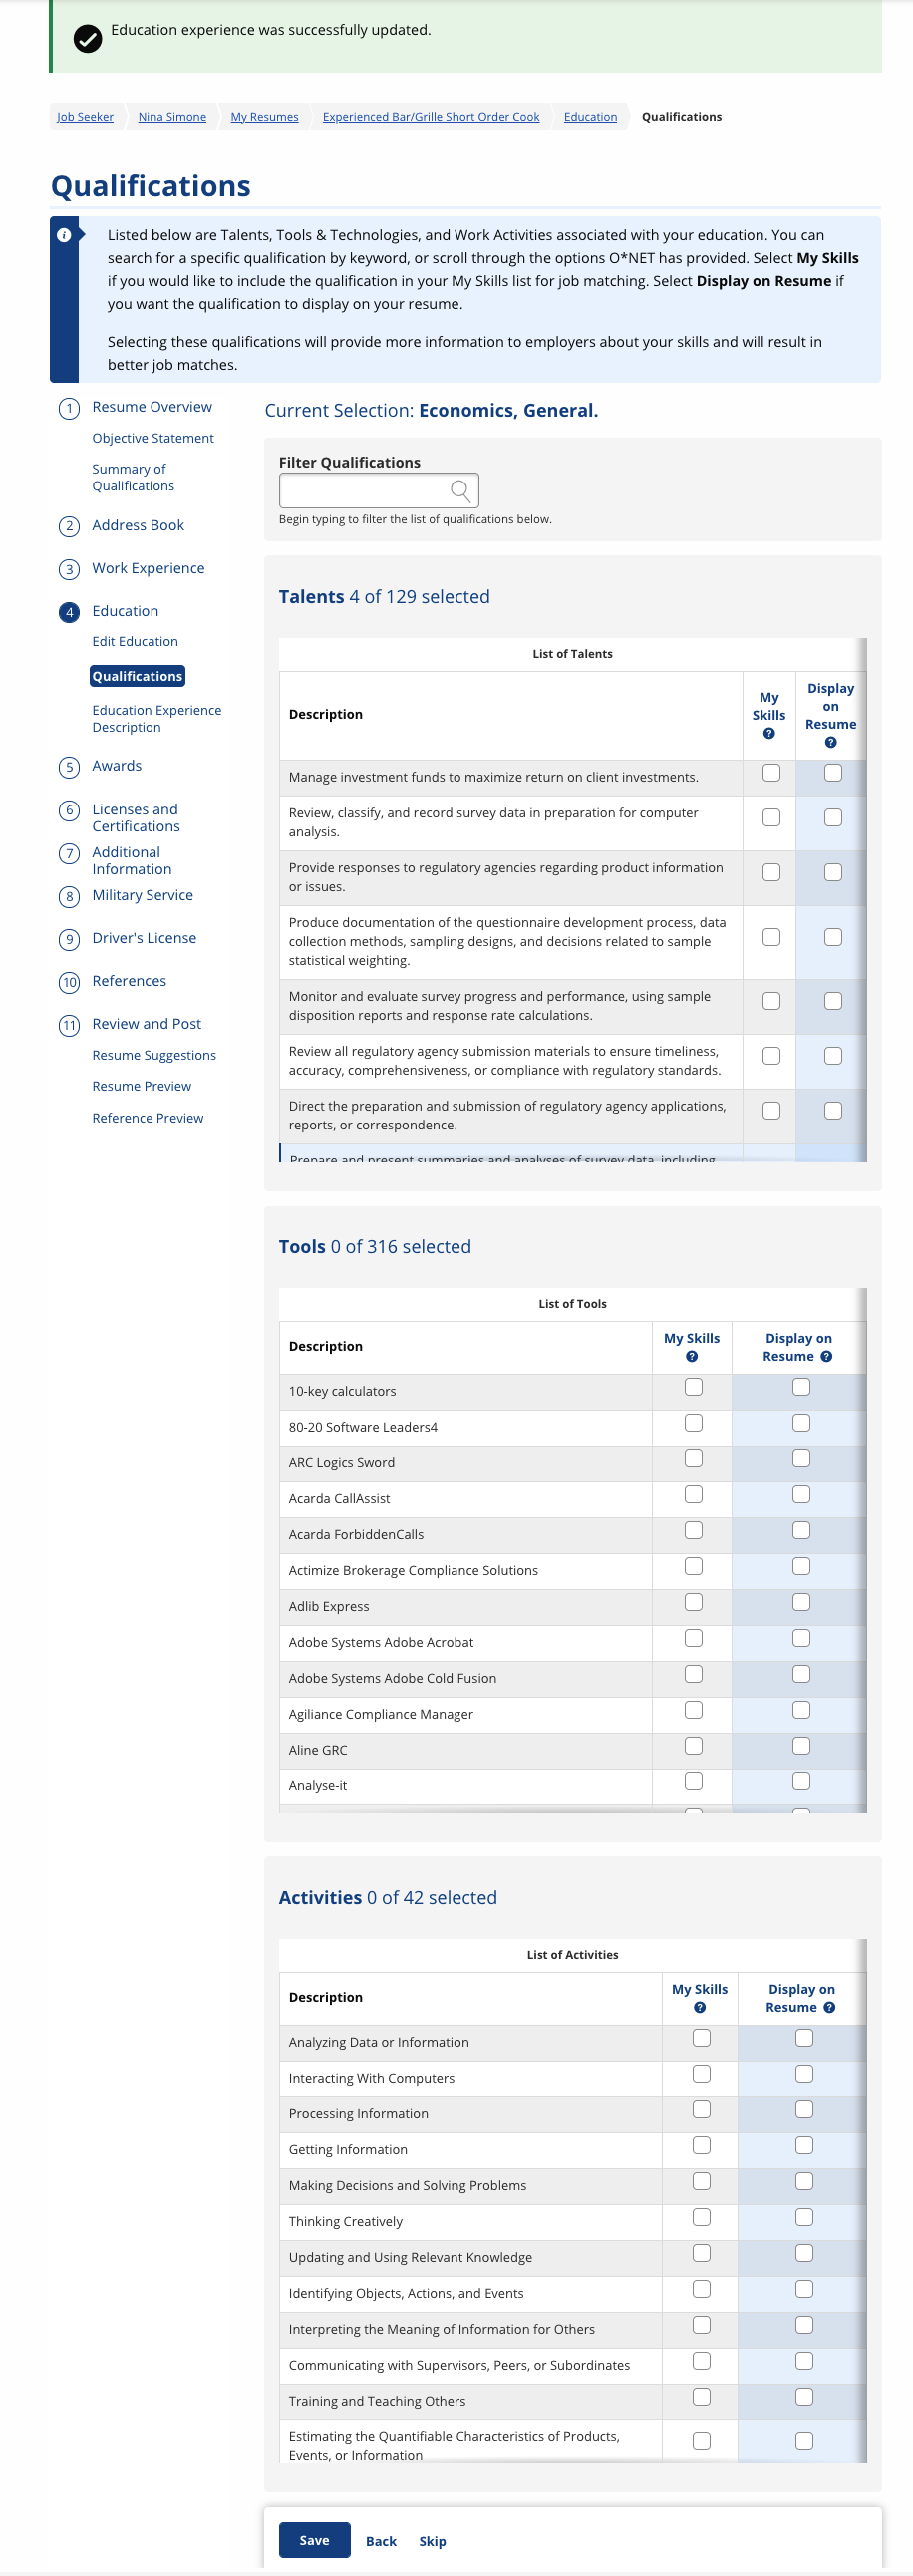
Education: Qualifications
If you select "Yes" to add education experience, the Qualifications page displays. Based on the area of study you selected, ONET populates a list of talents, tools and technology, and work activities that the Job Seeker may have gained during your education. Next to any item that describes the Job Seeker's qualifications, select My Skills. These items will be added to the My Skills list and help with job matching and gap analyses. Next to any item you wish to display on the resume, select Display on Resume. When you are finished, select Save.
Education Description
All items you selected to display on your resume show in the text box. Make any edits and select Update Education.
If you skipped the Qualifications step, you must enter at least 25 characters in the text box to describe the Job Seeker's education experience. If you would like to review the list of Qualifications again, select Review and Edit Selections.

Step 5: Awards
The Awards section of the resume wizard allows you to enter information about honors or awards the Job Seeker has received. From Step 5, you can add new awards and edit or remove existing awards. When you are finished, select Continue to proceed to the next step.
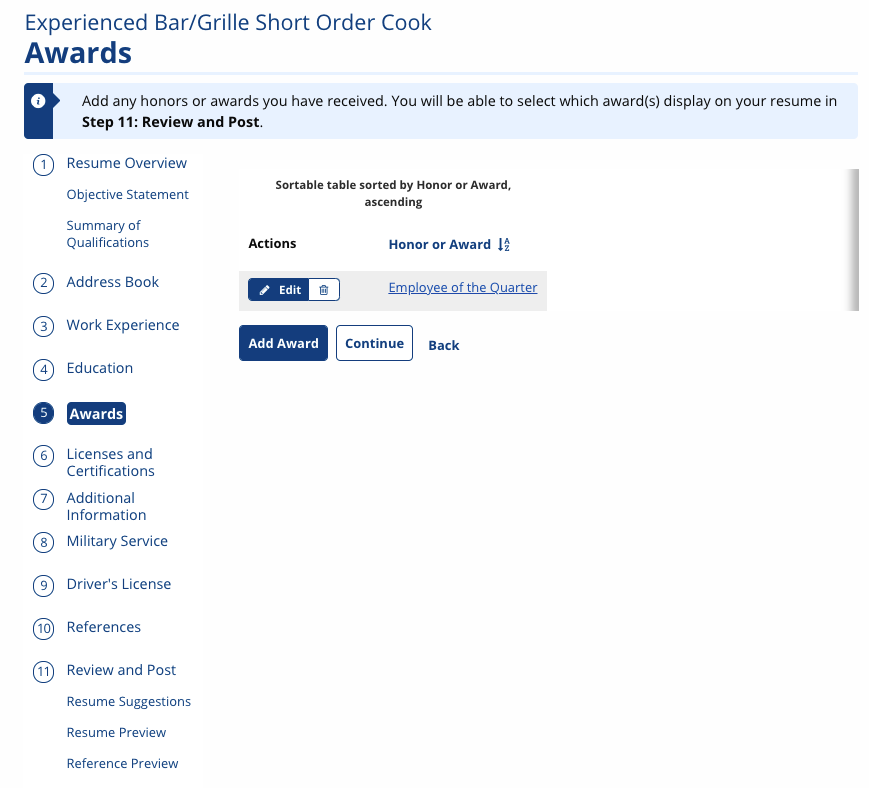
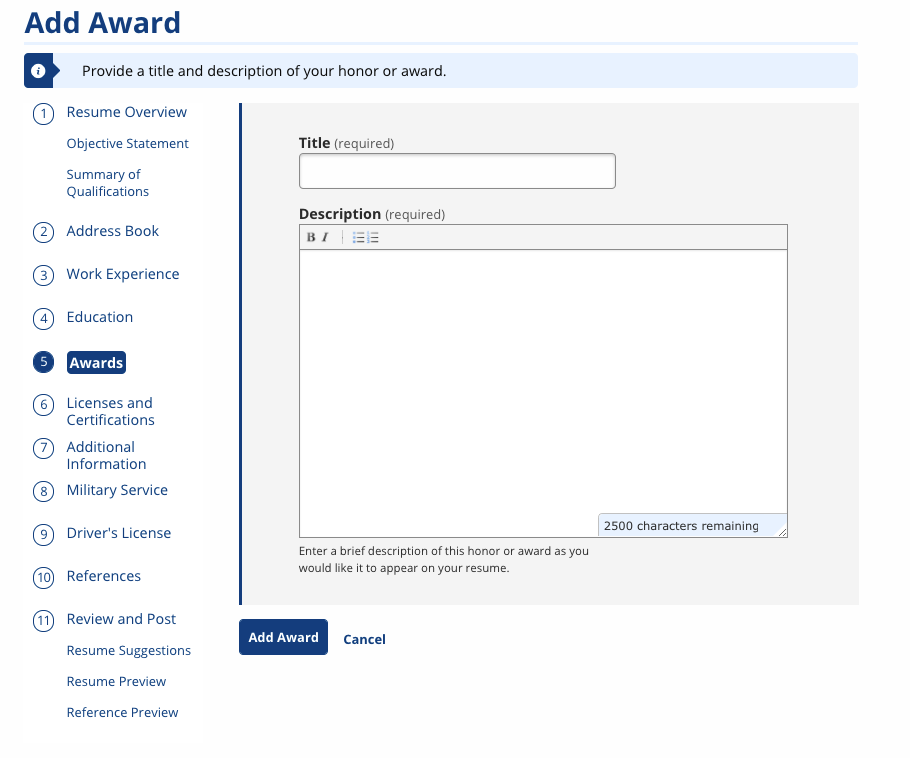
Add Award
Select Add Award. The Add Award page displays. Enter a title and description, then select Add Award.
Step 6: Licenses and Certifications
The Licenses and Certifications section of the resume wizard allows you to enter information about any licenses, certifications, digital badges, or credentials the Job Seeker has earned. From Step 6, you can add new certifications and edit or remove existing certifications. When you are finished, select Continue to proceed to the next step.
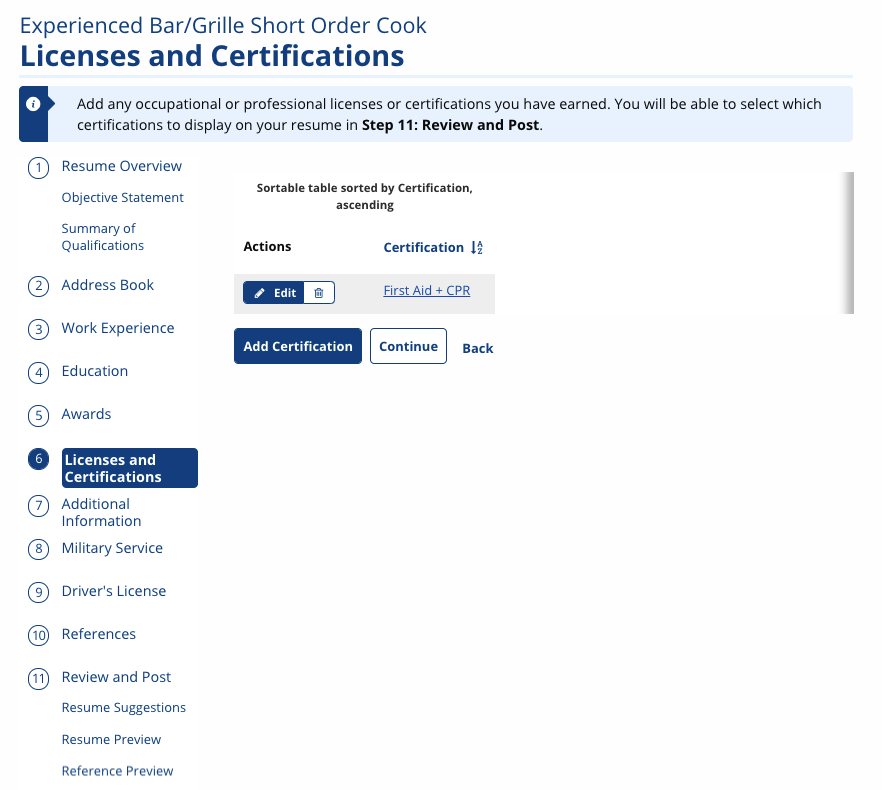
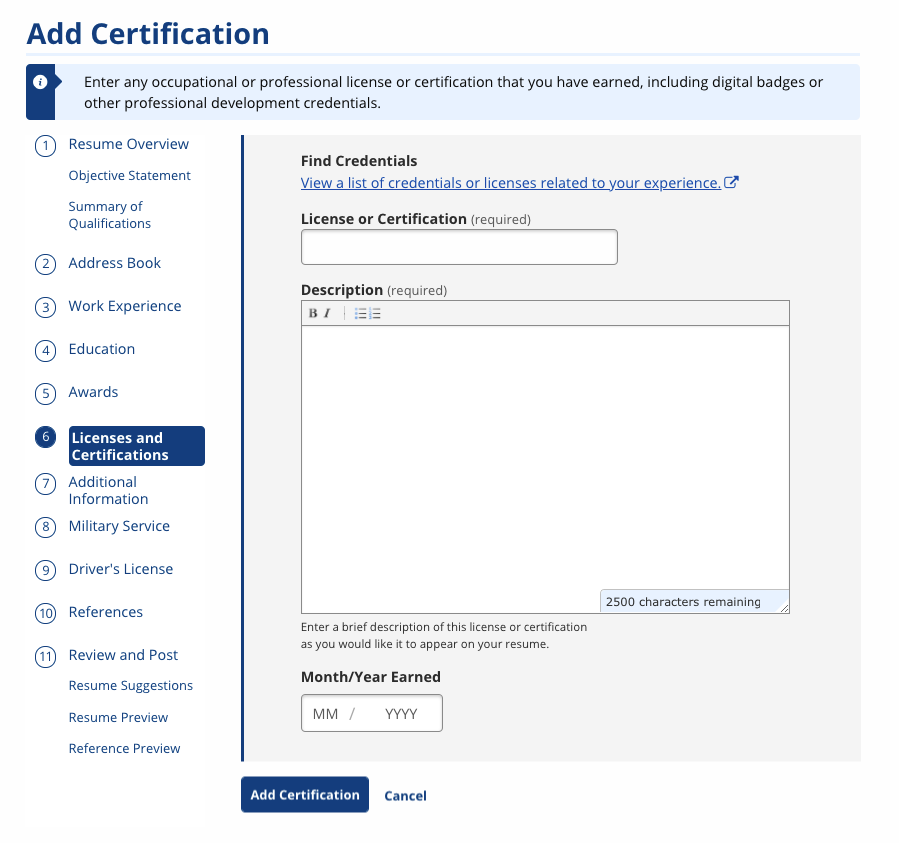
Add Licenses/Certification
Select Add Certification. The Add Certification page displays. Enter a title, description, and date earned. Use the link to view a list of credentials related to your experience in CareerOneStop. When you are finished, select Add Certification.
Step 7: Additional Information
The Additional Information section of the resume wizard allows you to enter any additional information not yet reflected on the resume. This might include volunteer experience, a list of software or hardware expertise, or a list of skills or activities not currently listed on the resume. From Step 7, you can add new additional information and edit or remove existing additional information. When you are finished, select Continue to proceed to the next step.
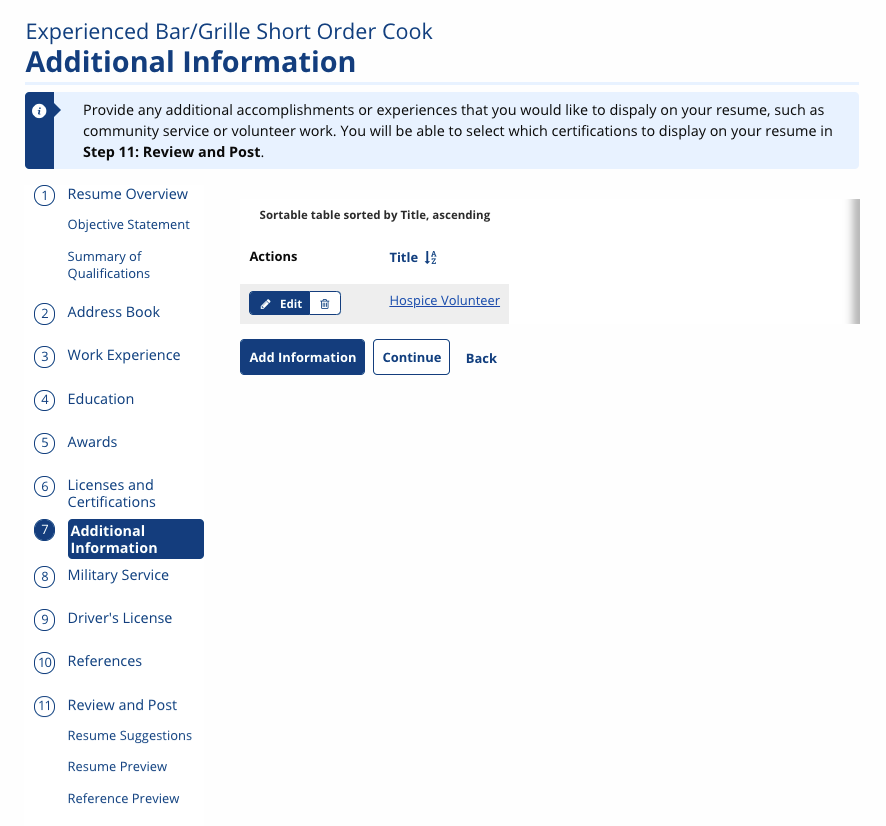
Add Additional Information
Select Add Information. The Add Additional Information page displays. Enter a title and description of the content the Job Seeker wishes to add. When you are finished, select Add Additional Information.

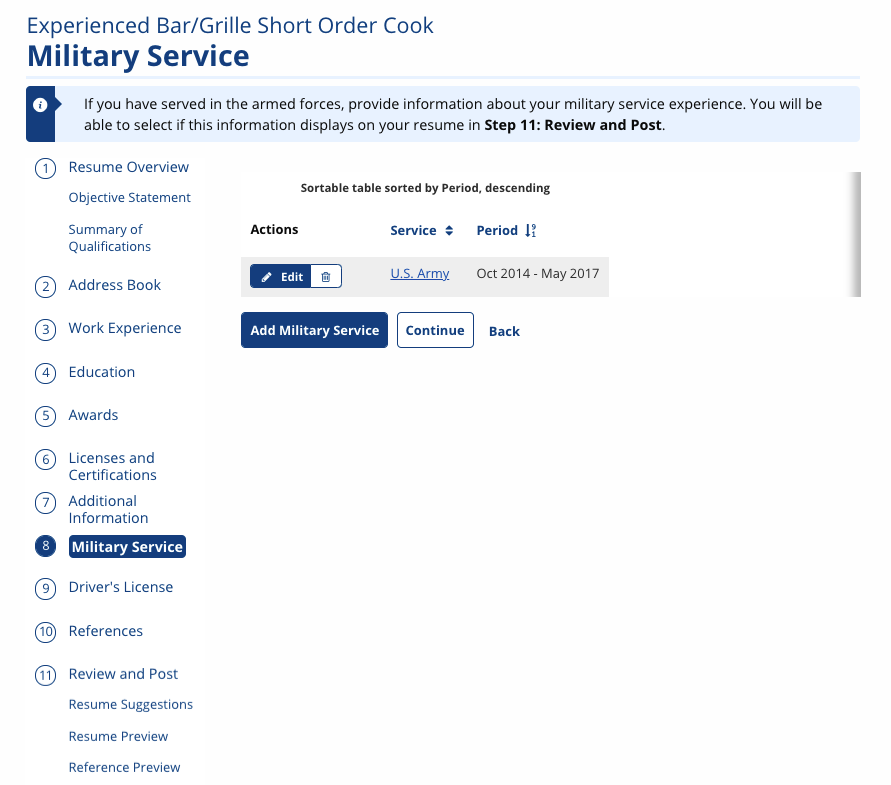
Step 8: Military Service
The Military Service section of the resume wizard allows you to enter details about the Job Seeker's military experience. This might include service dates, campaigns, or promotions. From Step 8, you can add new military experience and edit or remove existing experience. When you are finished, select Continue to proceed to the next step.
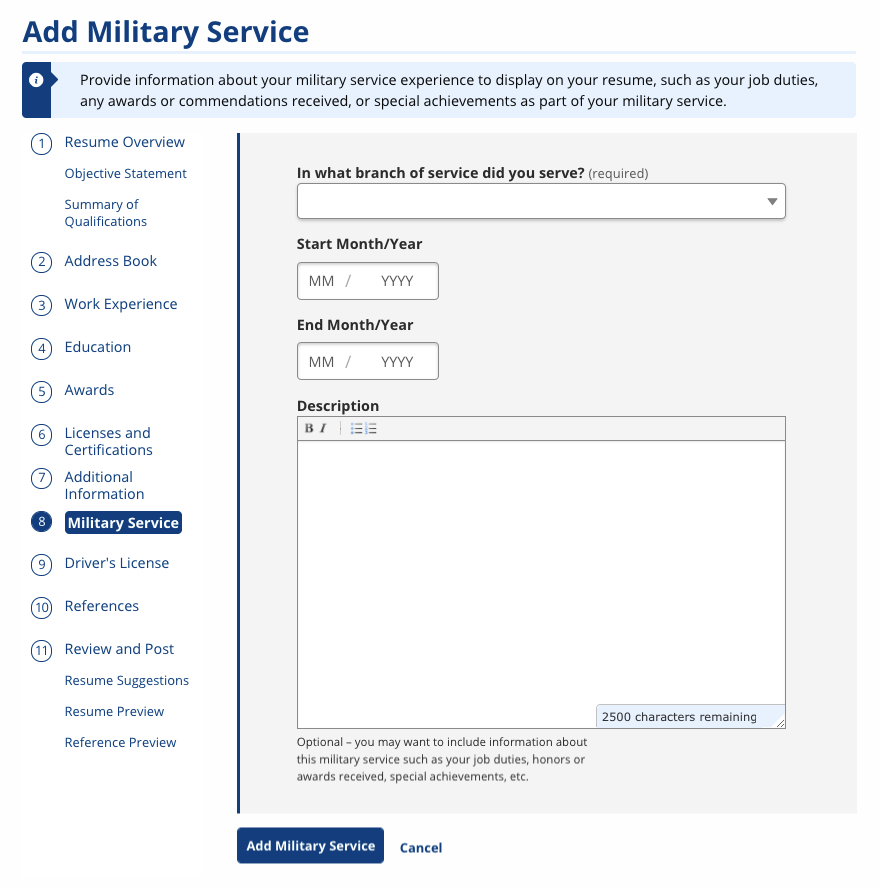
Add Military Experience
Select Add Military Service. The Add Military Service page displays. Enter the branch in which the Job Seeker served, the service dates, and any additional information. When you are finished, select Add Military Service.
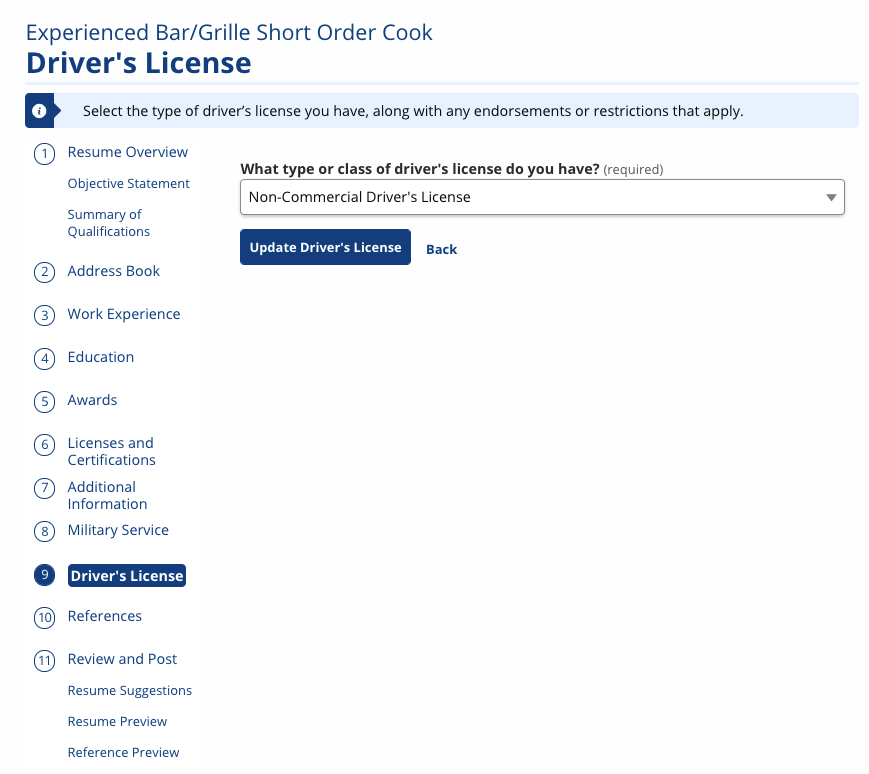
Step 9: Driver's License
If the Job Seeker answered that they have a valid driver's licenses on the Resume Overview, the Driver's License section displays. Select the type of driver's license the Job Seeker holds, and select any relevant restrictions or endorsements. Select Update Driver's License. When you are finished, select Continue to proceed to the next step.
Step 10: References
The References step of the resume wizard provides an opportunity for the Job Seeker to enter reference information they might share with employers. This information cannot be viewed by employers; it can only be saved as a Word or PDF file for the Job Seeker to use at their discretion. It is not necessary to add any references. When you are finished, select Continue to proceed to the next step.

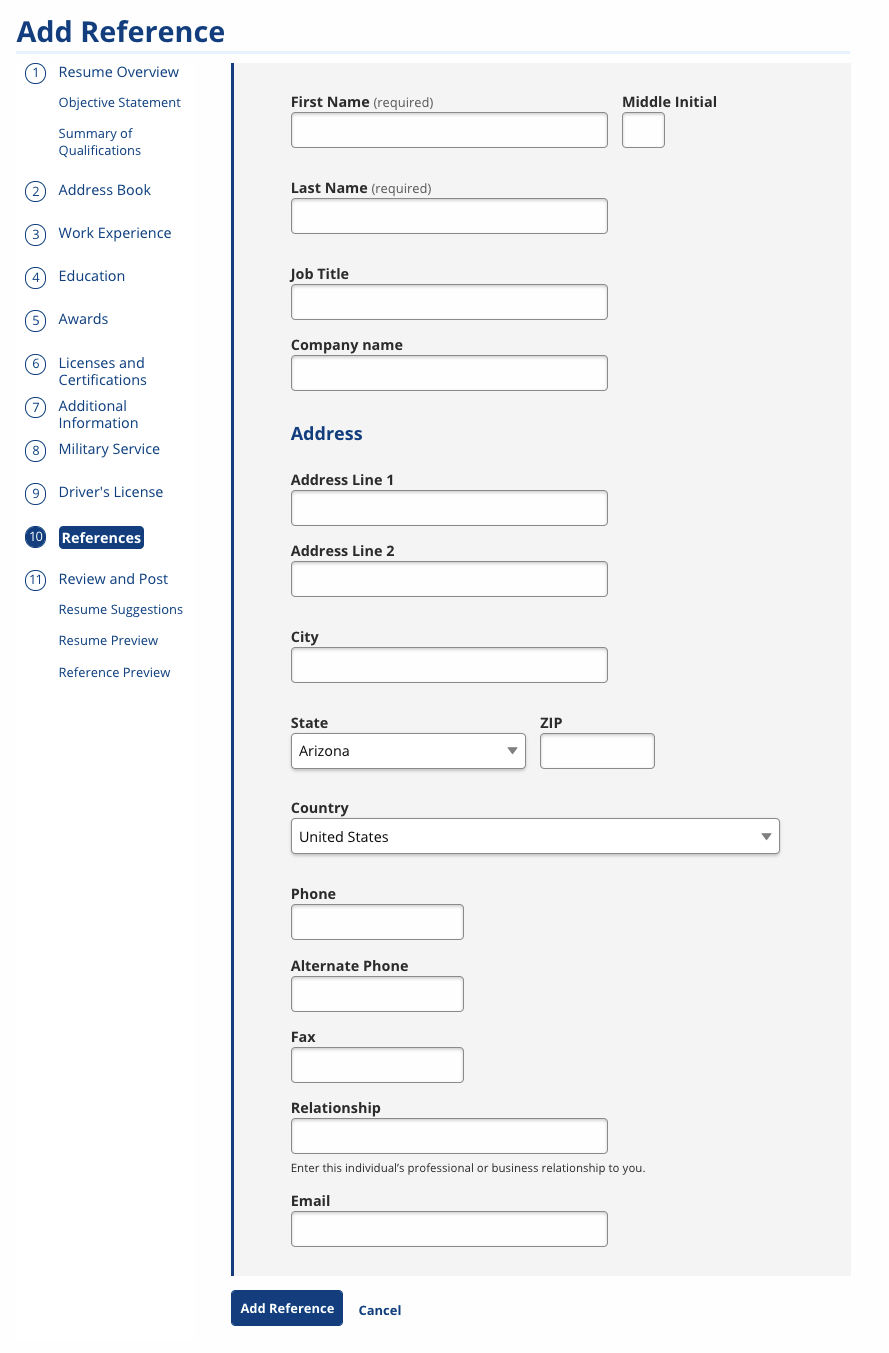
Add References
If the Job Seeker wishes to enter reference information, select Add Reference. The Add Reference page displays. The Job Seeker can provide as much detail as they wish, but must provide a first and last name. We recommend the Job Seeker provide at least one method of contact and the relationship (e.g., supervisor, co-worker, mentor, etc.). When you are finished, select Add Reference.
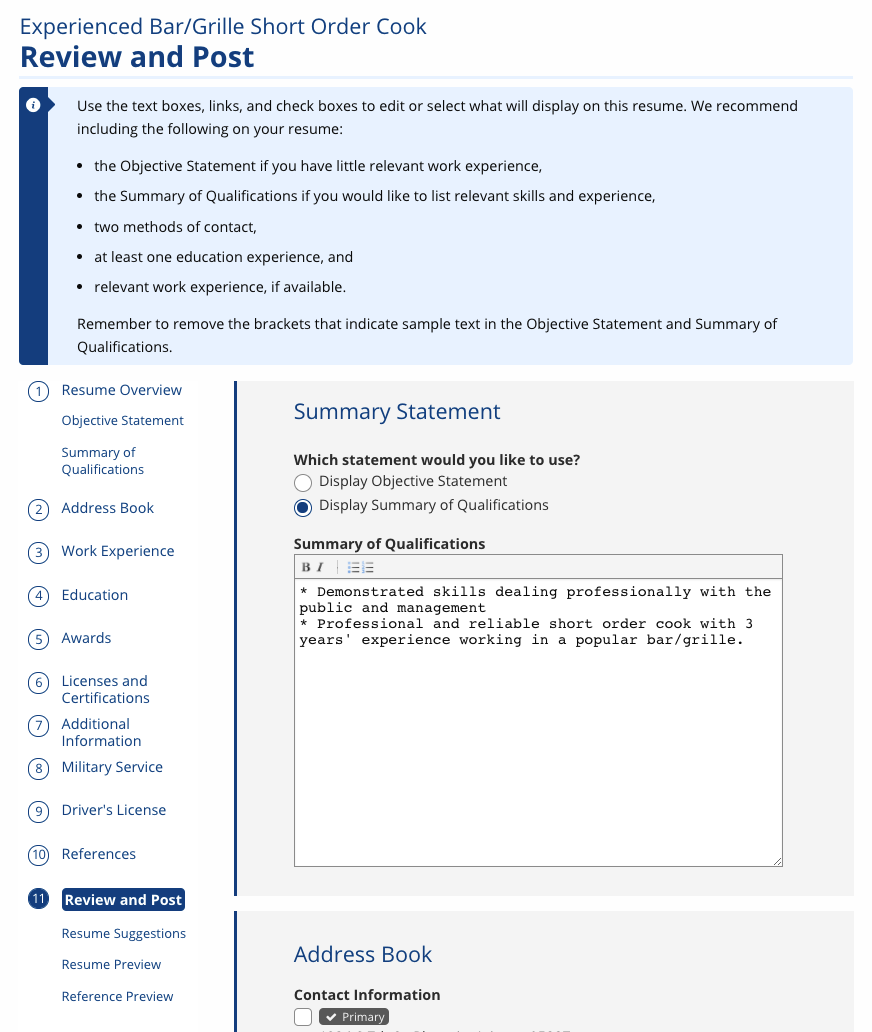
Step 11: Review & Post
The Review and Post page allows you to select what content will be displayed on the resume. It is broken up into sections:
- Summary Statement: Select either an Objective Statement or a Summary of Qualifications. This is the text that displays in the resume search beneath the resume title, so it's important to highlight the Job Seeker's skills. The text is editable, and all brackets should be removed from the text.
- Address Book: Select the contact methods the Job Seeker wishes to display on the resume. At least one method must be selected. In some states, two methods must be selected. Select Edit to modify any entry, or select Add Contact Method to add, edit, or delete contact methods.
- Work Experience: Select the work experience(s) the Job Seeker wishes to display on the resume. Select Edit to modify any entry, or select Add Work Experience to add, edit, or delete entries.
- Education: Select the education experience(s) the Job Seeker wishes to display on the resume. Select Edit to modify any entry, or select Add Education to add, edit, or delete entries.
- Additional Information: Select the awards, certificates, or additional information the Job Seeker wishes to display on the resume. Select Edit to modify any entry, or select Add Award, Add Certification, or Add Additional Info to add, edit, or delete entries.
- WorkKeys Score: If a WorkKeys score has been entered for the Job Seeker, you can select whether to display the certicate on the resume. The score will also display next to the resume titile in the Resume Search. Your state may not use WorkKeys or may have a different term for them. See WorkKeys for more information.
- Military Service: Select the military experience the Job Seeker wishes to display on the resume. Select Edit to modify any entry, or select Add Military Service to add, edit, or delete entries.
- Driver's License: Select the driver's license the Job Seeker wishes to display on the resume. Select Edit to modify any entry, or select Edit Driver's License to add, edit, or delete the entry.
- References: Select the references the Job Seeker wishes to display on a page of references. Select Edit to modify any entry, or select Add Reference to add, edit, or delete the entry.
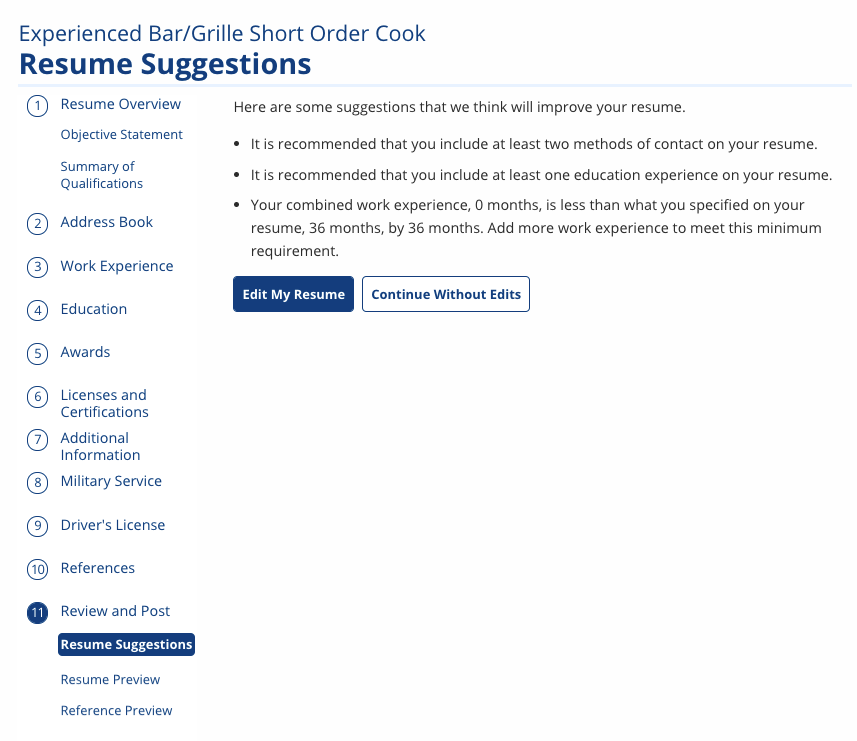
Resume Suggestions
A resume auditor makes suggestions for resume improvements. To make any changes, select Edit My Resume, or if satisfied, select Continue Without Edits.
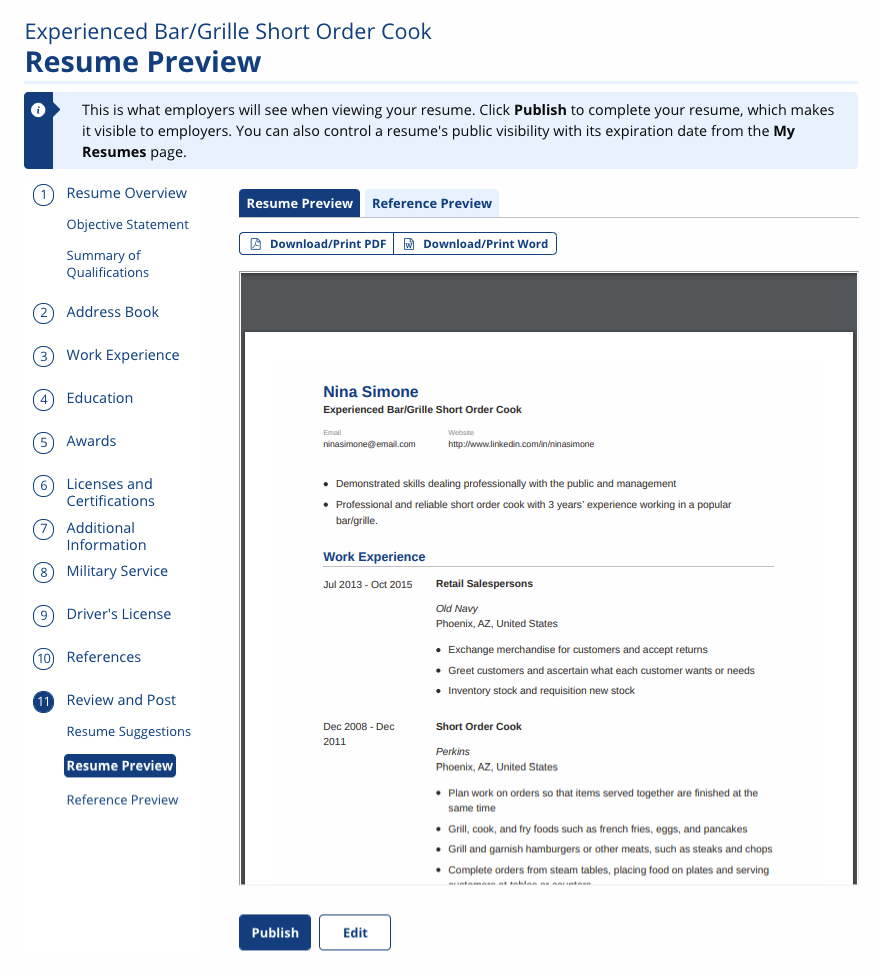
Resume Preview
A preview of the resume displays. Use the scroll bar to view all resume contents.
- Download/Print PDF: Select to save or print a PDF of the resume.
- Download/Print Word: Select to save or print a Word file of the resume.
Veteran priority of service for resumes means employers will see the resumes of veterans immediately, while resumes of covered persons or other eligibles and non-vets will be visible to employers based on state policy.
Reference Preview
To view, download, or print the References, select Download/Print PDF or Download/Print Word. To edit any information, return to Step 10: References. To prevent a reference from displaying, deselect the reference on Step 11: Review & Post.