User Search
The new universal User Search makes it possible to search for any type of AJL user (job seekers, employers, and staff), including accounts unique to the ProviderLink (ETP) section of AJL (Provider/School, Local Area, and State Admin). All previously existing searches (e.g., Client Search, Employer Search) remain available for use by staff. From the User Search results, staff with the appropriate privileges can edit the user’s Account Status or Contact Information. The purpose of the User Search at this point is to search for a specific user and edit the account status or the contact information of that user.
From the User Search results, all staff can disable and reactivate job seekers, and can edit the contact information for job seekers and employers. The ability to disable and reactivate employer, ETP, and casetracker accounts, as well as to edit contact information for ETP and admin accounts are all specific privileges that must be granted through Admin Tasks.
Navigation
To navigate to User Search, click User Search in the main menu.
Conduct User Search
- To search for an individual user of any type, in the left-hand navigation menu, click User Search.
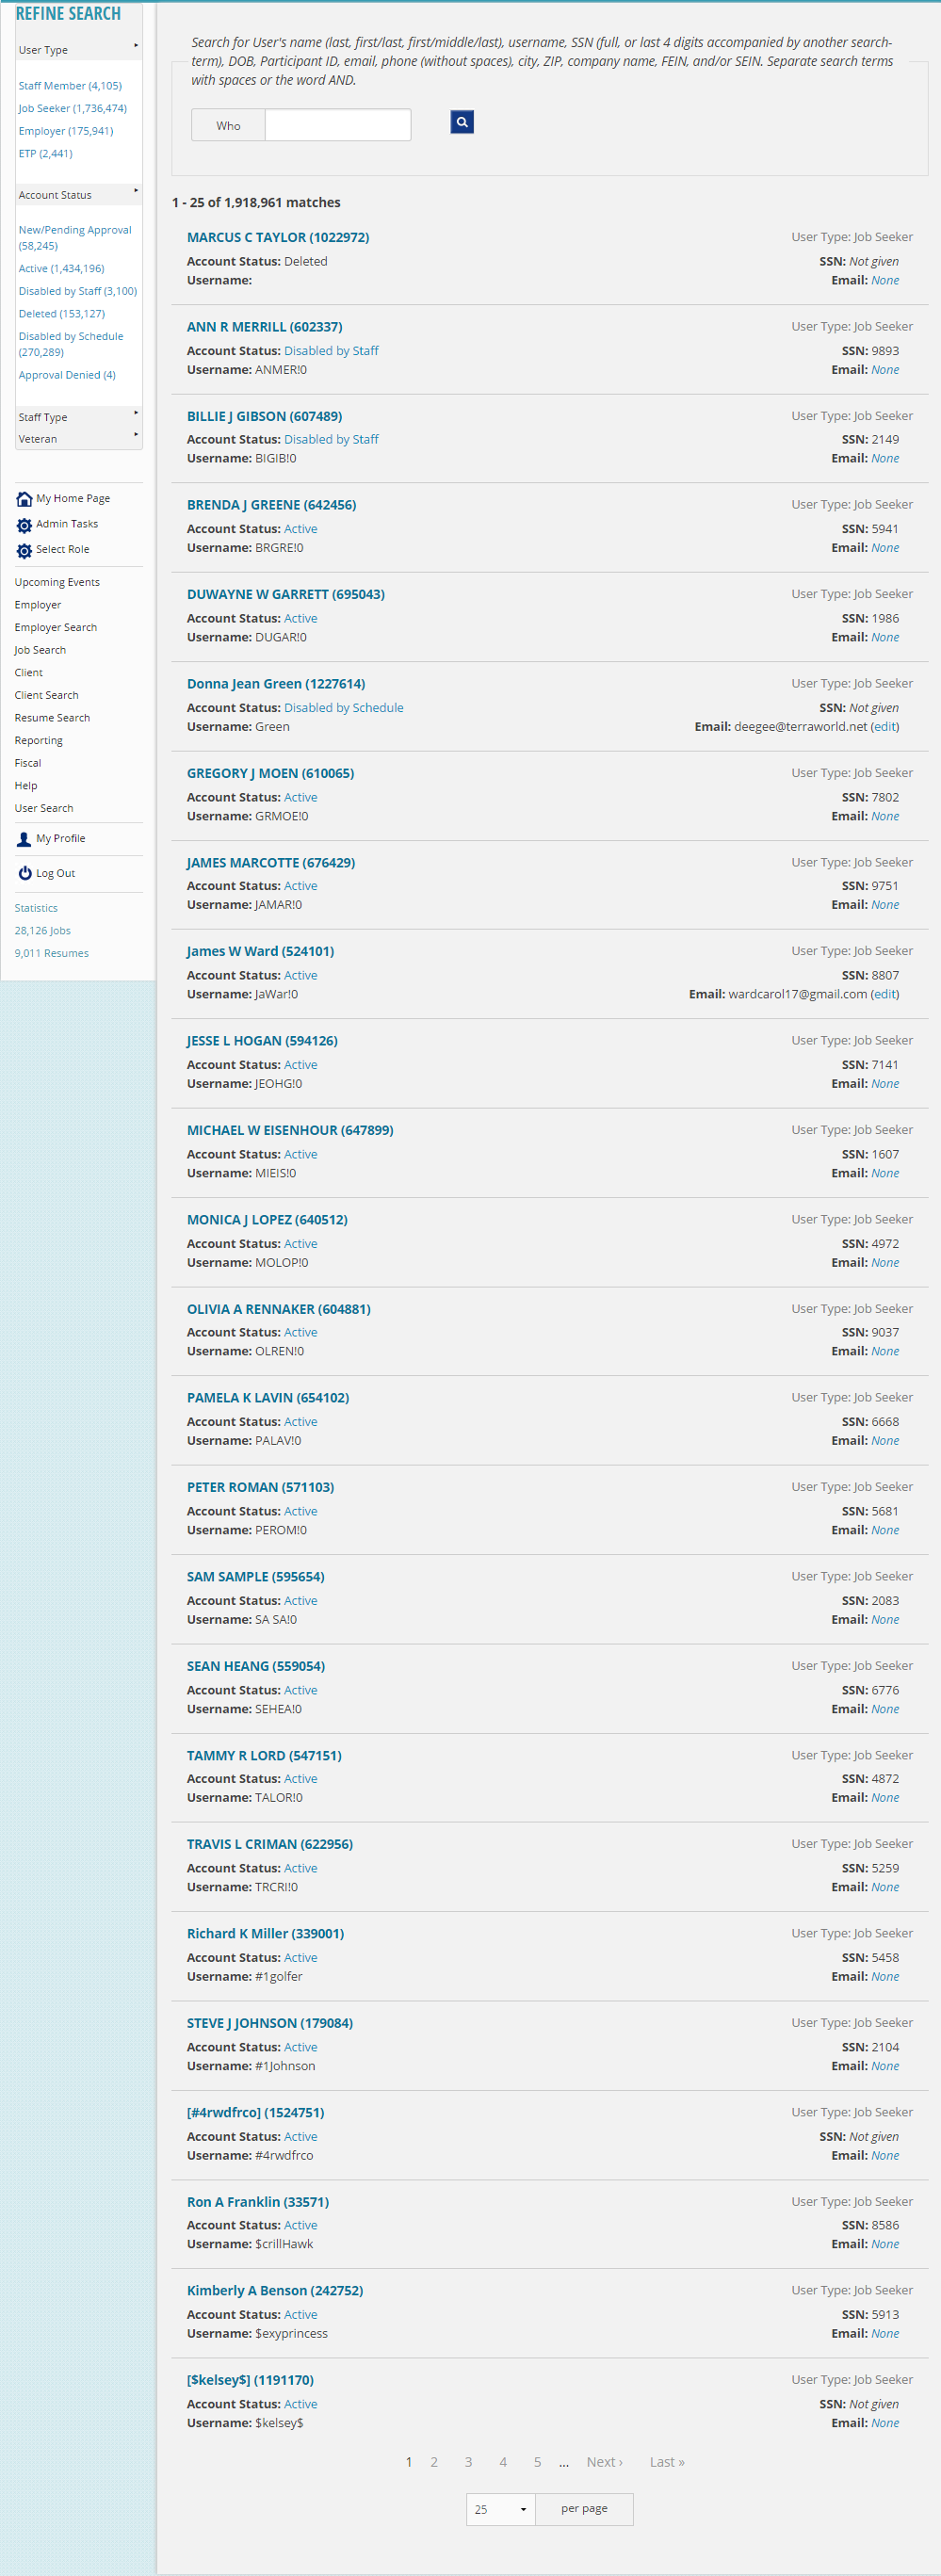
- The User Search page displays, listing all active users within your office. Users include job seekers, employers, staff (including ProviderLink Local Area and State Administrators), and eligible training providers.
- The search defaults to displaying all active users. To view both active and inactive users, click the X next to the Account Status: Active label in the Filtered By section.
-
 Type your search parameter in the Who box. Click the magnifying glass or press Enter to continue. The following are available search parameters (click to view drop-down list):
- User’s name (last, first/last, first/middle/last)
- Username
- SSN (search by full SSN or by last name and last four of SSN)
- Date of birth (mm-dd-yyyy or mm/dd/yyyy)
- Participant ID
- Phone
- City
- ZIP
- Company Name (only returns employer and Eligible Training Provider [ETP] account types)
- FEIN (only returns employer and ETP user types)
- SEIN (only returns employer user types)
Note: You can use spaces to separate search terms, or to find an exact match, you can use quotation marks (e.g., "Joy Bancroft") or join the search terms with the word AND (e.g., Bancroft AND Topeka).
-
Searches can be narrowed using the available filters in the left-hand Refine Search menu (click to view drop-down list):
- User Type
- staff member
- job seeker
- employer
- ETP
- Account Status
- New/Pending Approval
- Active
- Disabled by Staff (manually disabled by staff with appropriate permissions)
- Deleted (manually deleted by staff with the appropriate permissions. Deleted clients cannot be reactived within AJL.)
- Disabled by Schedule (disabled by auto-disabler)
- Approal Denied (only returns staff, employer, and ETP user types)
- Staff Type
- Casetracker (returns all levels of staff except Admin)
- Admin
- Veteran
- Yes
- No
- Office location (varies by state)
- User Type
Edit Contact Info
- To manage a user’s contact information, from the User Search results, click the link in the Email section. Users who have an email address will display their email address with an edit link. Users without an email address will display a None link. Both of these links direct to the user’s Contact Information page.
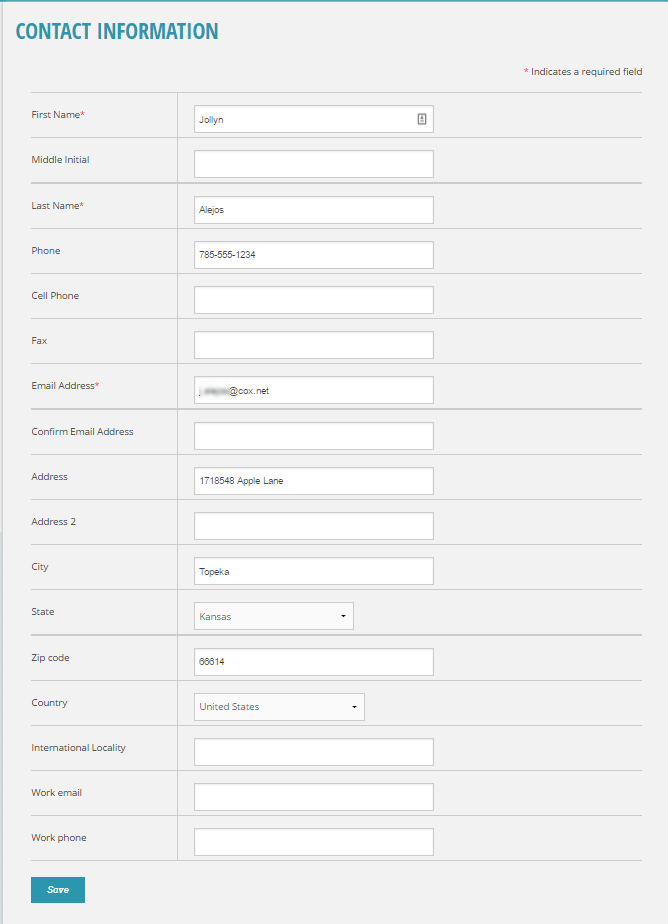
- Contact Information pages will differ according to type of user.
- Edit the Contact Information as necessary such as adding or updating the email address.
- Click Save to update the contact information
Edit User Account Status
-
To manage a user’s account status, from the User Search results page, click the Account Status link. You can click the user’s name to view their Case Details page (job seekers), Employer Details page (employers), or User Profile (staff or ETP). The status you see here depends on the user type as listed below: (click to view drop-down list)
- Possible Statuses for User Type: Job Seeker
- Active
- Disabled by Staff (manually disabled by staff with appropriate permissions)
- Deleted
- Disabled by Schedule (disabled by Auto-Disabler)
- Possible Statuses for User Type: Staff, Employer, and ETP
- New/Pending Approval
- Active (active and approved)
- Disabled by Staff (manually disabled by staff with appropriate permissions)
- Deleted
- Disabled by Schedule (disabled by Auto-Disabler)
- Approval Denied
Note: Only Active, Disabled by Staff, and Disabled by Schedule will display as links for Account Status at this time. You cannot Approve or Deny employers, staff, or ETP users from the User Search.
- Possible Statuses for User Type: Job Seeker
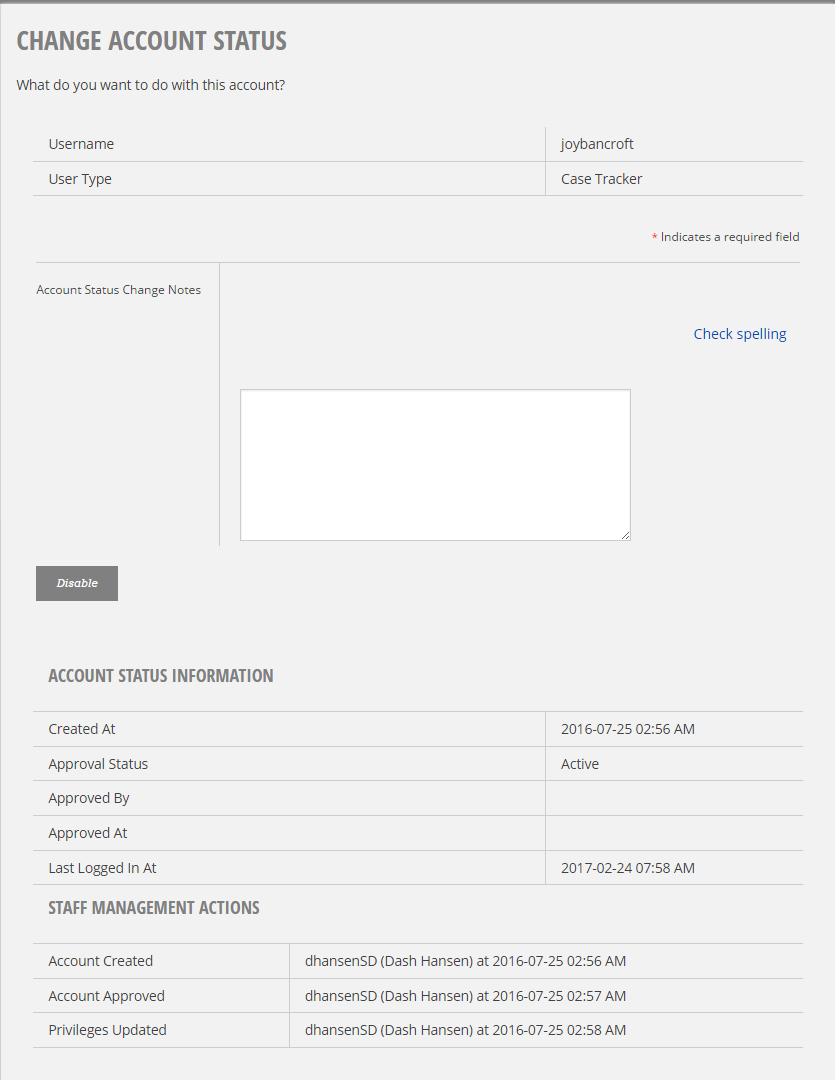
- The Change Account Status page displays.
- Review Account Status Information and Staff Management Actions to confirm when the account was last used by staff or user.
- Staff Management Actions will only display if the account has been disabled or reactivated, or for staff accounts, if the privileges have been edited.
- To disable an active account, click Disable. The account Account Status will change to “Disabled by Staff.” When a user attempts to log into a disabled account, they will see a message similar to the following. (Messages are customizable by state.)
- To re-enable a disabled account, click Reactivate. The Account Account Status will change to “Active.”
- Use the Notes field to provide a description for the Account Status. These notes are only visible on the Account Status page.
- Review Account Status Information and Staff Management Actions to confirm when the account was last used by staff or user.