Create Provider Account
To create a new account, you must be associated with a training provider or registered apprenticeship sponsor. Thus, the path to creating an account is different for users who have an existing training provider record in ProviderLink, those who need to create a new training provider, and those who need to create registered apprenticeship sponsor accounts.
- Locate and have available the training institution’s FEIN, basic identifying information, contact person and his/her basic identifying information, and details about at least one training program.
Create a New Account for an Existing Training Provider
Your user account must be associated with a training provider. If your training provider has a record in ProviderLink, and you would like to add or update information, follow these steps:
- Locate and have available your training institution’s Federal Employer Identification Number (FEIN).
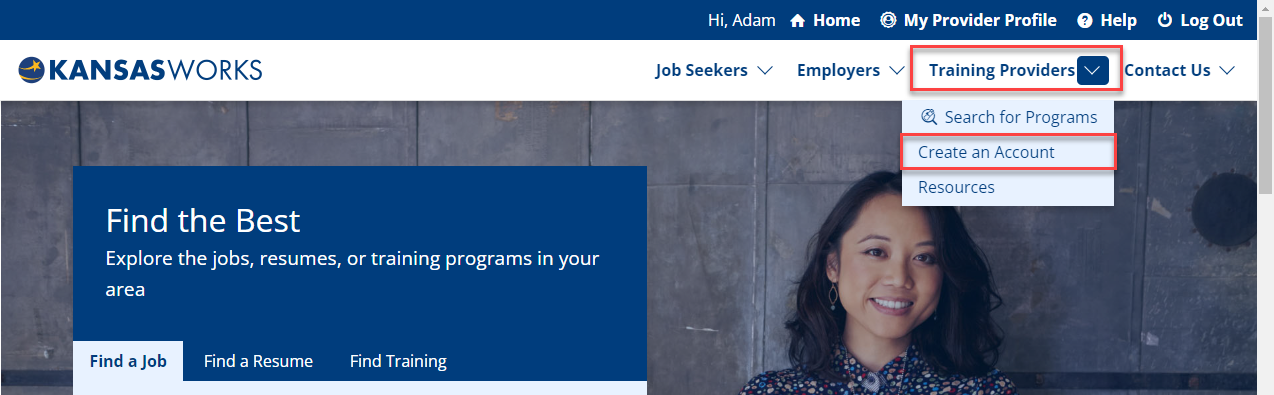
- Go to America’s JobLink. At the top of the home page, click Training Providers > Create an Account. The Create Training Provider Account page displays.
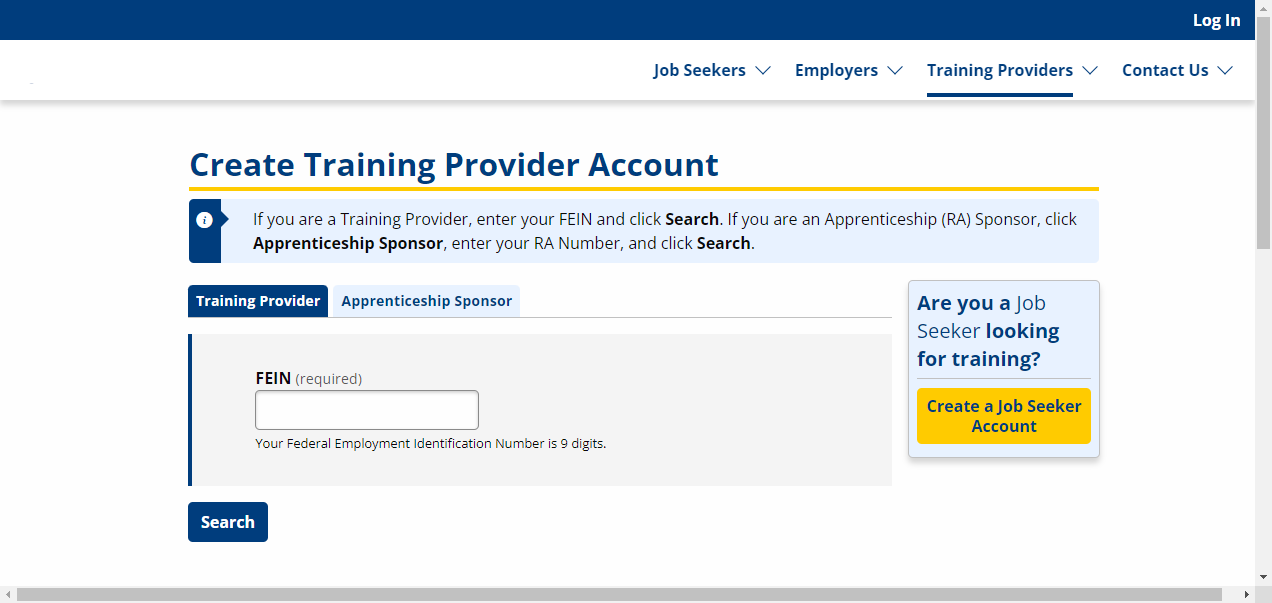
- Enter your FEIN and click Search.
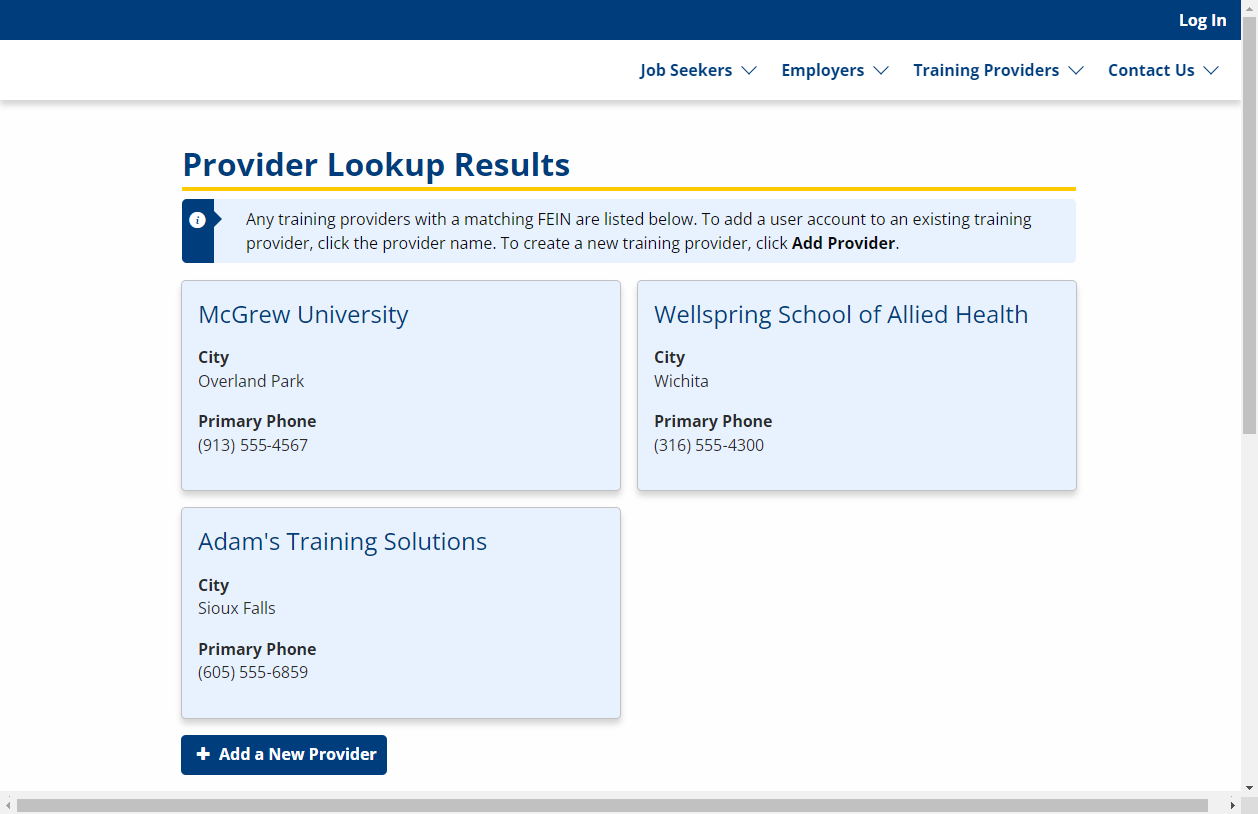
- If the FEIN matches an existing training provider, a link will display beneath the FEIN search with the name, ID number, city, and phone number of the training provider.
- Click the link of the correct training provider. The Eligible Training Provider Assurances page displays.
- Review the information on the Eligible Training Provider- Assurances page. If the training institution assures compliance, select Accept to continue.
- If the training institution cannot assure compliance, click Decline to terminate the application process and return to the AJL Home page. Compliance is required.
- Complete the Training Provider Registration page.
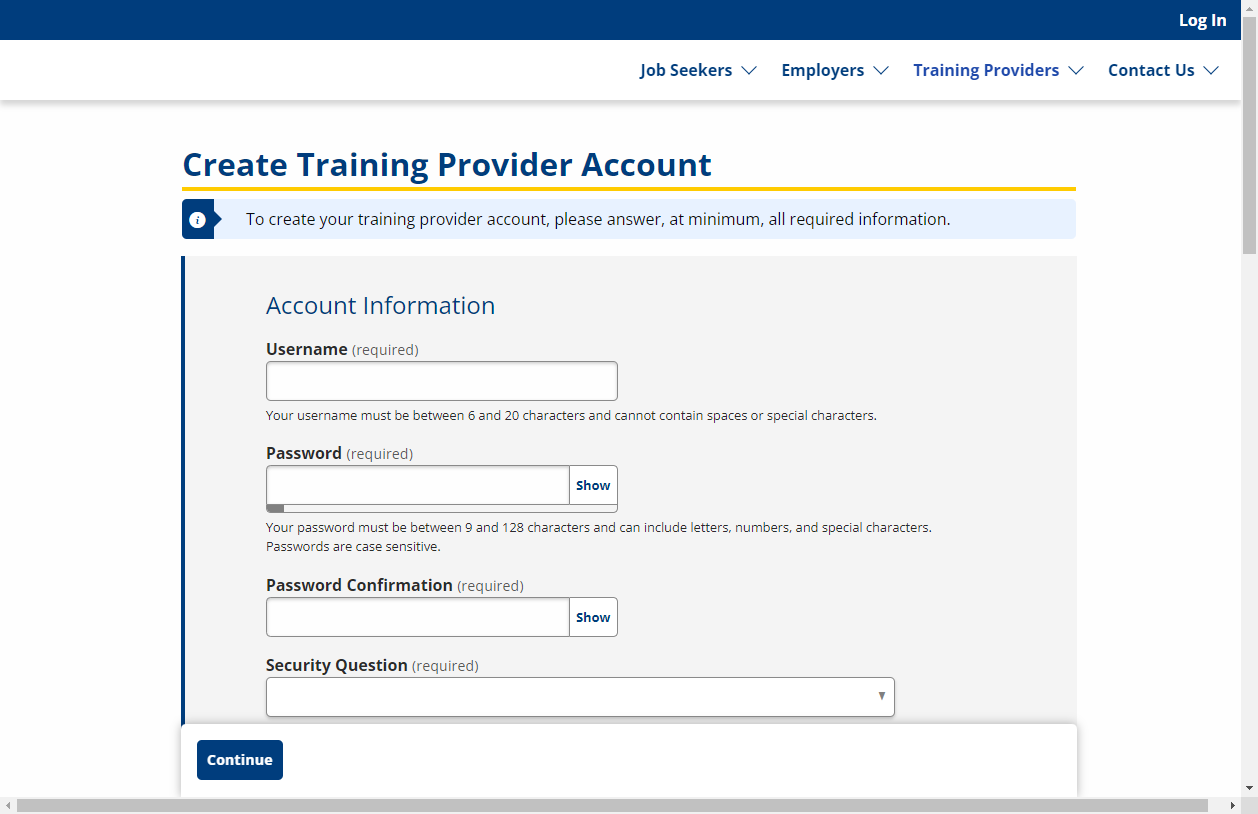

- Training Provider Registration Fields and Descriptions
Training Provider Registration Field Description Username (Text) Enter a username that is between 6 and 20 characters and does not contain spaces or special characters. Password (Text) Enter a password. - Passwords must be between 8 and 20 characters and must pass a strength test. A password that contains dictionary words or patterns that are easy to identify is considered weak. “Dictionary” words include first names, surnames, proper nouns, years, etc. The use of characters to replace common letters, like “3” for “E” or “@” for “a”—is also often considered weak. An example of a weak password is "December_2017" while a much stronger password would be "Decembrr12" or "ItIs20Dec17."
Password Confirmation (Text) Re-enter the password. Security Question (Drop-down) Select a security question to which you will remember the answer. Security Question Answer (Text) Enter the answer to your security question. First Name (Text) Enter your first name. Middle Initial (Text) Enter your middle initial or name. Last Name (Text) Enter your last name. Phone (Digits) Enter your primary phone number, including extension if available. Fax (Digits) Enter your fax number. Email (Text) Enter your email address. - Providing an email address is required. If you provide an email address, you will receive an email with confirmation instructions. If you provide an email that has already been confirmed, you will receive a validation message: "This email address has already been confirmed. If you think you have an account with this email, go to Forgot Username or Password. Otherwise, provide a different email address. If you think this message is in error, contact <your state's help desk>."
Email Confirmation (Text) Re-enter your email address. - Click Continue. A message will display: "For security reasons, your account must be approved before you are allowed to update provider information. This validation is usually accomplished within 24 hours; however, please wait for 72 hours before making inquiries. If you provided an e-mail address, you will receive an e-mail notification that your account has been approved."
- After your account has been approved, you can log in using the username and password established when you created your account. You will have access to the provider and program information for the associated training provider.
Create a New Account and New Program for a New Training Provider
If after searching for your training provider using the Provider Lookup described above, you find they do not have a record in ProviderLink, you will need to add the provider. The steps to create an account, add a new provider, and add a program are designed as one flow. After you create your account, ProviderLink will immediately prompt you to add your provider information. After you add the provider information, ProviderLink will then prompt you to add a program.
- After adding a program, you can make no further changes or additions until your account is approved. The initial approval of your account is NOT approval for the WIOA ETP List; it is approval for access to the system. This validation is usually accomplished within 24 hours; however, please wait 72 hours before making inquiries. If you provide an e-mail address, you will receive an e-mail notification that your account has been approved. After your account is approved, you can add additional programs and make edits as needed.
Add New Account
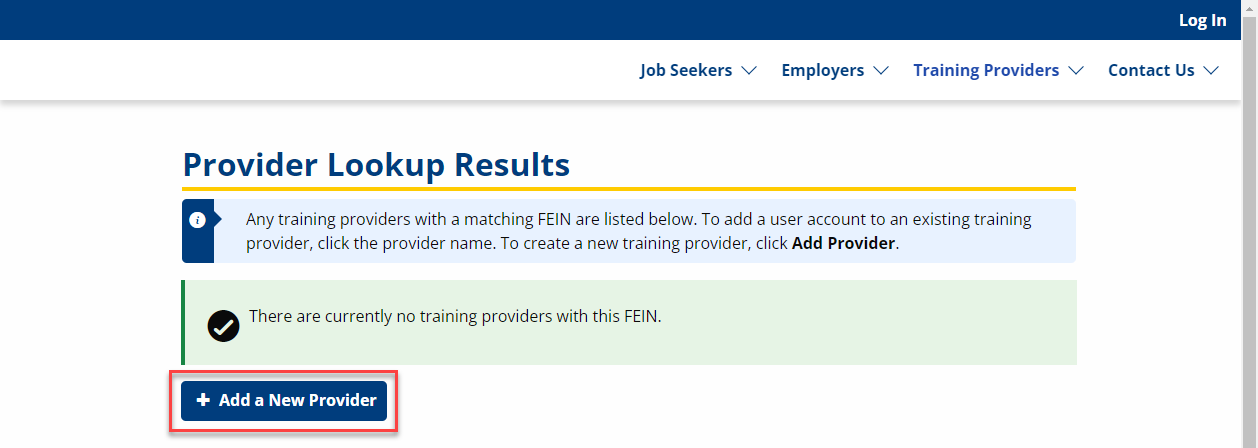
- When no FEIN match is found, or if the correct training provider is not listed, click + Add a New Provider.
- Carefully review the information on the Eligible Training Provider - Assurances page. If the training institution assures compliance, select Accept to continue. The Create Training Provider Account page displays.
- If the training institution cannot assure compliance, click Decline to terminate the application process and return to the AJL Home page. Compliance is required.
- Enter information for the training provider. Required fields are marked.
- Training Provider Registration Fields and Descriptions
Training Provider Registration Field Description Username (Text) Enter a username that is between 6 and 20 characters and does not contain spaces or special characters. Password (Text) Enter a password. - Passwords must be between 8 and 20 characters and must pass a strength test. A password that contains dictionary words or patterns that are easy to identify is considered weak. “Dictionary” words include first names, surnames, proper nouns, years, etc. The use of characters to replace common letters, like “3” for “E” or “@” for “a”—is also often considered weak. An example of a weak password is "December_2017" while a much stronger password would be "Decembrr12" or "ItIs20Dec17."
Confirm Password (Text) Re-enter the password. Security Question (Drop-down) Select a security question to which you will remember the answer. Security Question Answer (Text) Enter the answer to your security question. User Information First Name (Text) Enter your first name. Middle Initial (Text) Enter your middle initial. Last Name (Text) Enter your last name. Phone (Digits) Enter your primary phone number, including extension if available. Check the box below this field to opt-in to text messages. Fax (Digits) Enter your fax number. Email Address (Text) Enter your email address. - Providing an email address is required. If you provide an email address, you will receive an email with confirmation instructions. If you provide an email that has already been confirmed, you will receive a validation message: "This email address has already been confirmed. If you think you have an account with this email, go to Forgot Username or Password. Otherwise, provide a different email address. If you think this message is in error, contact <your state's help desk>."
Confirm Email Address (Text) Re-enter your email address. Provider Information Provider Name (Text) Enter the name of the training provider. - Although this is not desirable, an institution can (and often will) have more than one record in ProviderLink. For example, if the name is Hamilton Area Community College, one record may read Hamilton ACC, another may read HACC, and another Hamilton Area Community College. Take care to use the name consistently.
Description (Text) Describe the training provider’s business and provide any other relevant information. (500 characters max.) Address (Text) Enter the street address for the provider. - This address is used by the public to map the location and get directions. Avoid providing a P.O. box, because these cannot be mapped.
ZIP Code (Digits) Enter the ZIP or postal code of the institution. The City and State are automatically populated once a suggested ZIP is selected or if you tab/click away from this field. City (Text) Enter the city where the institution is located. State (Drop-down) Select the state where the institution is located. County (Drop-down) Select the county where the institution is located. Country (Drop-down) If outside of the United States, select the country in which the training provider is located. International Locality (Text) If applicable, enter the international state, province, or county in which the training provider is located. Phone (Digits) Enter the telephone number for the training provider, including extension if available.. Fax (Digits) Enter the fax number for the training provider. Email Address (Text) Enter an email address to which the public can address general information inquiries. Website (Text) Enter the URL for the training provider’s website. FEIN (Display Only) The FEIN entered in Provider Lookup displays. The FEIN can only be edited by ProviderLink staff. Training Institution Type (Drop-down) Select an option to indicate the type of institution: - Higher Ed: Associate’s Degree
- Higher Ed: Baccalaureate or Higher
- Higher Ed: Certificate of Completion
- National Apprenticeship
- Private Non-Profit
- Private For Profit
- Public
- Other
Are reasonable accommodations available upon request for people with disabilities? (Button) Select Yes or No. Are you in any partnership with any business? (Button) Select Yes or No. If you select Yes, a separate Business Partnership Description text box displays. Business Partnership Description (Text) Describe any business partnerships. Do you provide access to training for individuals who are employed? (Button) Select Yes or No. Do you provide access to training for individuals with barriers to employment? (Button) Select Yes or No. Primary Contact Information Name (Text) Enter the full name of the contact person for the training provider. Title (Text) Enter the title of contact person for the training provider. Address (Text) Enter the full address of the contact person or select the Use same address as above check box. County (Drop-down) Select the training provider's county. Country (Drop-down) If the contact person is located in a country other than the United States, select that country. International Locality (Text) If applicable, enter the international state, province, or county in which the contact person is located. Phone (Digits) Enter the telephone number for the contact person. Fax (Digits) Enter the fax number for the contact person. Email Address (Text) Enter an email address for the contact person. - Click Continue.
- Complete the Supplementary Documents section. Provide any supplementary documents (e.g., proof of accreditation, licensing, disability accommodations, etc.). The following file types are accepted: PDF, JPEG, PNG, or GIF. The files cannot be larger than 10 MB.
- Click File to select the document from your computer, and then click Upload.
- If no documents to upload at this time, click Continue.
- Complete the Credentials section. Answer questions related to the type of training provider and credentials offered, and then click Save to continue.
- Complete the Debarment section. Has your institution been debarred?
- Yes. Enter the Name of Debarment List and Date of Inclusion, and then click Add for any additional debarment or Save to continue.
- No, click Save to continue.
- Complete the Accreditation & Financial Aid section, and then click Save to continue.
- The Provider Status is Pending Approval at this stage of the account creation process.
- Complete the Manage Programs section. You may add one program when adding a new provider, and it is part of the user registration flow. Once the user account is approved, you can add additional programs. Program information that is required during account creation includes the following:
- Program Information
- Program Cost Items
- Curriculum
- Occupations
- Click Save. The new provider record is complete. You are now ready to add performance. After your user account is approved, you can return to the programs page and add more programs. See Add Provider Programs for more information.