Uploading a Resume
Posting your resume on JobLink is essential for attracting potential employers and applying for job openings. Your state also might require that you have an active resume so that you can receive all available services.
You can quickly and easily create an unlimited number of resumes using the resume wizard or you can upload a resume. Only resumes that are active (complete and not expired) display to employers. If you already have a Word or PDF resume, you can upload it to the system. If you upload your resume, only the title of the resume displays in the Resume Search results. (Resumes that are built with the resume wizard include an Objective Statement or Summary of Qualifications in the search results.)
- The resume file must be a PDF, Microsoft Word, Microsoft WordPad, or LibreOffice Writer document (.pdf, .doc, or .docx), no larger than 10 MB.
Related Links
Upload New Resume
If your state requires you to create a resume as part of JobLink registration, you are led directly from account creation to the New Resume page. If your state does not require you to build a resume during account creation, or if you want to create additional resumes, select My Resumes from the side menu. 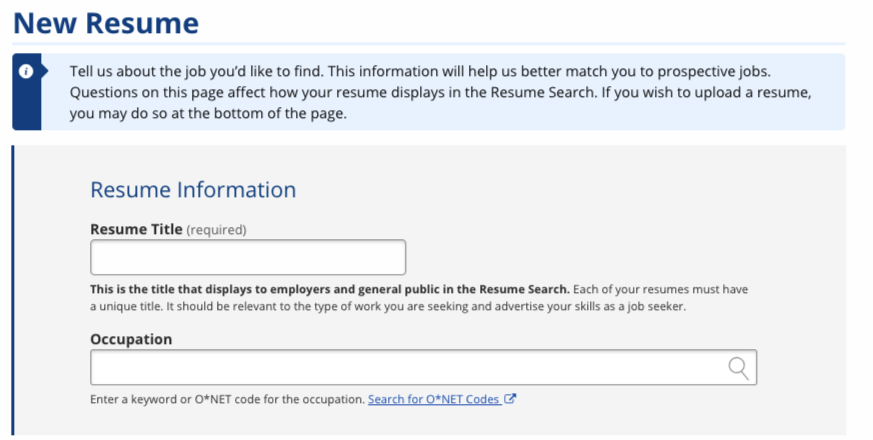
New Resume
The information you provide on this page does not display on your uploaded resume, but is used to better match you with available jobs and to make your resume display in our Resume Search.
- Complete the New Resume page and, at a minimum, fill out all required fields.
- For Resume Title, enter text that advertises your skills. This title appears to the public and to employers in the Resume Search.
- For the Occupation, enter a keyword related to the career you are seeking. A drop-down list of matches should display as you type. The occupation you select is connected to an Occupational Network (O*NET) code, and this code is used for job matching. Select the occupation that most closely matches the job you are seeking. If no occupations are displayed or if none match your desired occupation, provide a different keyword.
- Click Select File to Upload to choose your resume file from your computer.
- Highlight the file name from your computer, then select Open. The file name then replaces the text in the field beside it.
- When you have provided all required information, select Create Resume. The Qualifications page displays.
- Your resume does not display in the Resume Search until you select Publish on the final step of the wizard.
Based on the occupation title you selected, you can select talents, tools, or activities related to this work experience. Select any qualifications you have that are related to your previous work experience. You can search for a specific qualification by keyword, or scroll through the options O*NET provides.
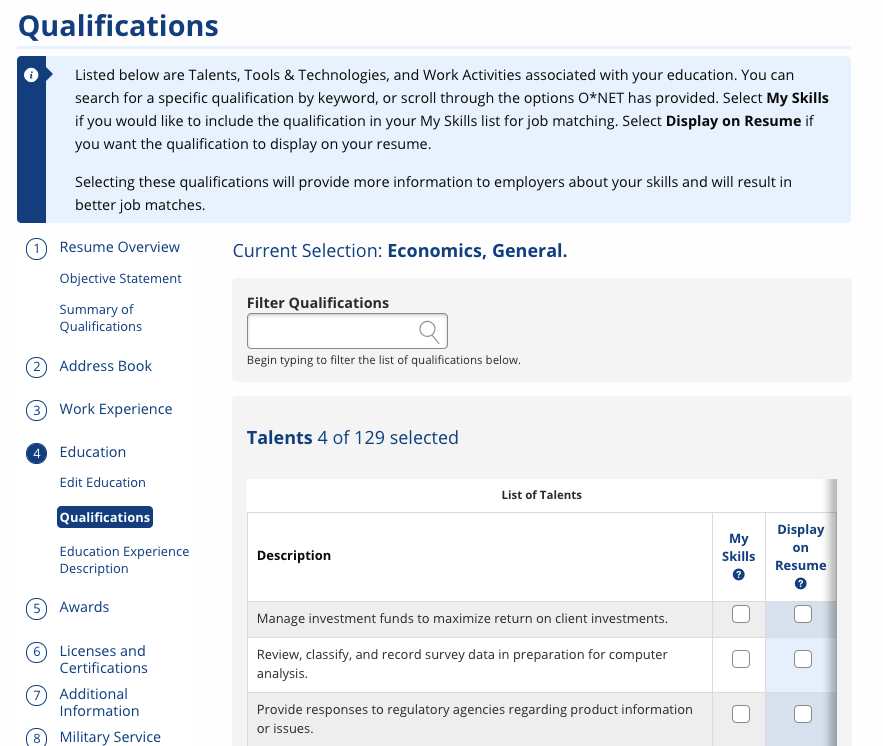
Selecting these qualifications provides more information to employers about your skills and results in better job matches. We suggest displaying no more than 5 skills for each work experience, so select those that highlight your talent.
- Select the checkbox beside each Talent, Tool, or Activity that you would like to add to your list of qualifications. These items are added to your My Skills list and do not display on your uploaded resume.
- Select Save. The Resume Preview page displays.
- Select Skip to go to the Resume Preview page without selecting any qualifications.
Resume Preview
The Resume Preview page shows the resume as it will display in the Resume Search or as a .doc, .docx, or .pdf.
- To upload a different resume, select Resume Overview select Edit.
- If you wish to print or download the resume or references, at the top of the resume preview, select from the following:
- Download/Print PDF
- Download/Print Word (You cannot upload a PDF and then download it as a Word file.)
- If you are satisfied with your resume, select Publish. The resume is now available for employers to view and is available on your My Resumes page.
- Resumes are automatically set to be active for 90 days. To make an active resume inactive, set the number of days until expiration to zero. The maximum you can set your resume to active is 200 days (depending on your state). (See more in Managing Your Resumes.)